WordPress developers spend most of their time thinking about their website optimization and totally ignore another important part, site accessibility. Your WordPress Website accessibility is about creating equal access to your WordPress website and content for all users, including those with disabilities. The more accessible your site is, the more people can use it. Indeed, some of these disabilities are minor, but this leads to an awful user experience for people with disabilities. Because of that, today we’re outlining the easiest components to make your WordPress website more accessible so that people can explore your site with ease – no matter what. Fortunately, there are plenty of ways to make your site more user-friendly. But before that, we’ll discuss the topic of WordPress website accessibility in more depth. Let’s take a look!
What is WordPress Website Accessibility and Why does it Matter?
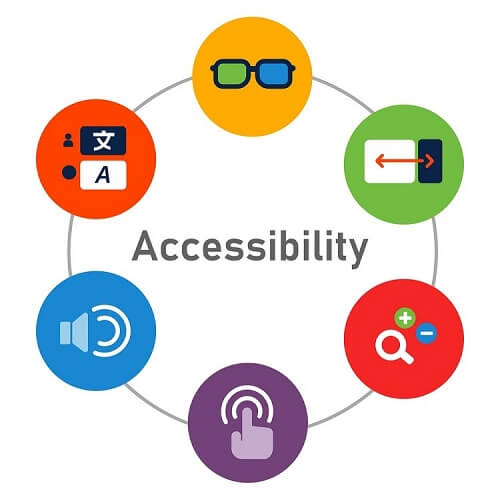
We all know, that there are a large number of web users who have some physical disability so they cannot see, read, or comprehend the content that other people can. As the numbers are high you cannot ignore the vast traffic segment. You must follow the guidelines and make your WordPress site usable for all and making your site usable for all is called accessibility. WordPress website accessibility not only covers disabled people but also covers a few problems of ordinary people. For instance, people who lost glasses or a broken limb, surf the internet using low-speed connections, expensive bandwidth, or in challenging contexts such as extensive sunlight.
Recently WebAIM published research, where they analyzed one million homepages for accessibility issues and found that 98% of websites had at least one Web Content Accessibility Guidelines (WCAG) failure on their homepages, such as low-contrast text, missing image alt text, and empty links. These types of accessibility barriers make it difficult or impossible for visitors who are blind, deaf and hard of hearing, and disabled. The problem is most WordPress developers do not realize much with regard to website architecture, accessibility, or design guidelines. Moreover, some of them don’t want to add WordPress accessibility because it affects the site design and beauty. But if your website is not readable by these people, that’s a lot of potential traffic lost.
Make WordPress Website Accessibility Ready:
While designing your website, it’s important to remember that not all of your potential visitors are the same. Try to understand what will make your site accessible to maximum visitors, and take a hard look at your site to see where it’s currently lacking. Some people use ready-made accessibility solutions, while some opt for Custom WordPress Development in order to implement the accessibility on their websites. In this article, we will talk about 6 components to make your WordPress website accessibility-ready.
1. Test Your WordPress Website Accessibility:
There are no magic wands that will give you a fully accessible site in one click. To make sure that all your bases are covered, you need both automated and manual accessibility tests. Before you start making any changes to your site to make it more accessible, it’s best to see how accessible it is right now.
Automated tests are used to generate a list of problems to tackle. They track down things like poor color contrast, missing alt text, empty links, problems with structural elements, etc. Sometimes we can’t see code-based errors in the naked eye, but those errors matter significantly to some of your users, here automated tests come in handy. There are plenty of tools that can help you out – such as the Web Accessibility Evaluation Tool (WAVE). They provide a simple browser-based solution to take a close look at your site and provide a lot of useful information. You just need to simply type your site’s URL into the bar and WAVE will display different, color-coded icons that represent sections of your site that are okay, need improvement, or are actual errors. By clicking on each one, you’ll get a concise and clear explanation of what the issue is.
On the other hand, manual testing will give you a genuine picture of your website from a user’s point of view. You can discover the problems like visibility is clear or not, navigation is smooth or disorienting, how zoom is working, interactive elements performance, and an array of other things with manual testing which you miss in automated testing.
2. Make Your Content Readable:
When it comes to making your website more readable, colors and fonts are the first two things you need to consider. Fonts and colors are essential components of any website that strengthen your visual identity. Using fonts and colors appropriately on your website can help your website’s overall accessibility. It’s generally recommended that the smallest font of your site should not be smaller than 16 pixels. But there are many themes out there that use very small text. If your theme uses a very small font size, increase it right from the Block editor.
Try to enlarge your text three times to see if the font size increases and if the layout breaks. You can test this out by hitting “Ctrl” and “+” at the same time in your browser. Users with limited vision, but who can still mostly see, will know how to increase the font size and will probably have default settings configured on their device or web browser. So, your theme needs to support that. Also, avoid font style that makes your site difficult to read, distinguish, and recognize the characters, because less-legible fonts don’t allow users to absorb your content.
There are 300 million people in the world who have color blindness. People who have visual impairments or color blindness will get a poor user experience if they are unable to meet the WCAG color contrast standard. When you use colors that make text and buttons hard to read and comprehend, visitors are much more likely to simply click away from your site. Fortunately, fixing the low contrast issue is very simple. Use a color contrast checker to check the color contrast. Simply choose a foreground and background color and let the tool determine whether the colors are properly balanced or not. If it’s not, the tool will let you know.
3. Offer Clear Navigation Menu:
While developing your site, it’s necessary to make sure that interactive elements can be identified easily. Since many users with disabilities use screen readers, your navigation menu has to be consistent and clear. The better your webpage’s structure, the more navigable and understandable it is for users, screen readers, and search engines.
To make your website easy to navigate for all visitors, aim to design it with an intuitive layout and simple navigational elements. Position navigation menu items in a logical, consistent way and make sure your navigation menus are fully responsive and mobile-friendly. Keep them predictable and make them look the same on every page. Try to make it easy to find homepage menu items, and solutions, locate key pages, and contact forms.
Some users with mobility issues cannot use a mouse and heavily rely on a keyboard to navigate. Your website should be accessible via keyboard so they can easily navigate your site via keyboard. Make sure people can use the Tab key when they are visiting your site. Allow visiting links, menus, menu items, forms, and buttons using the Tab key. There is a simple accessibility-testing technique to make sure your website is keyboard accessible. Start at the top of a page and use “Tab” and “Shift + Tab” to traverse up and down the page, check if you can access all the links in your menus.
When it comes to an accessible navigation menu, skipping navigation links is one of the most underrated issues. When you use navigation links, screen readers don’t differentiate between the menu and content. A skip link is utilized to drive users directly to the main content by skipping the navigation. Thankfully, WordPress is equipped to support logical navigation to start with. You can also play with custom menus to ensure you’re offering the clearest link options possible.
4. Add Alt Text to Images:
As a WordPress user, you must have heard about “alternative text”, in short, “alt text”. Alt text is a written description that you attach to your images to help your visitors understand those images. As it helps your users to understand the images, it makes your website more accessible for people who have disabilities. When you add an alt text screen readers read that description aloud to any guest who may not see the image so users with learning disabilities understand the images included in the content.
Alt text not only helps people with disabilities, but it can also help visitors who have slow internet connections, or who are otherwise unable to load images. Even if they can’t see those photos or graphics, they’ll be able to read what they contain. Alt text is also important for your site’s SEO. It gives search engine crawlers a better understanding of your website and helps you rank in the most relevant search results.
While adding alt text assume you are describing the image to someone who cannot see it, and describe it well enough that they can still understand what the image is about. Also, include alt text in everything from photos to icons to infographics. But alt text isn’t necessary for decorative images. You can easily add alt text to any images in the Media Library of your WordPress site.
5. Choose An Accessible Theme:
When it comes to themes, they are responsible for ensuring that the layout, navigation, and design elements are accessible. An accessible website should be navigated by the keyboard easily and friendly to screen readers. Also, sometimes themes come pre-bundled with color and font families. It is important to ensure that those colors and fonts meet the prerequisites to be accessible.
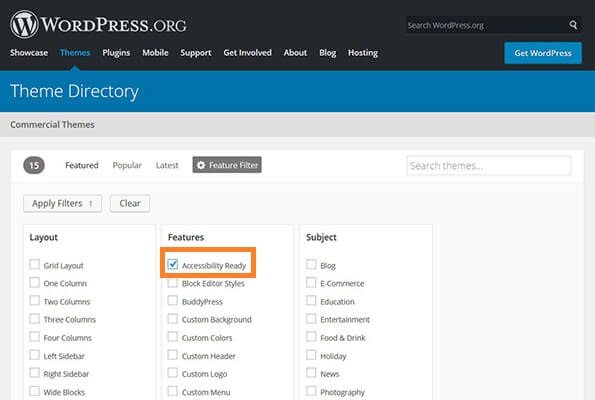
If you’re already using a theme and don’t want to change it, then you’ll have to use a plugin to make your website accessible. If you’re just starting on a site’s development or open to change, you can use free accessibility-ready themes from the WordPress theme directory. Just go to the directory and use the Feature Filter, then tick on the “Accessibility Ready” box. It will display all the accessible themes. Preview the themes and then download the most suitable one for your project.
Remember, many themes available in the market claim to be accessible but sometimes we come across accessibility issues with them. So testing is necessary. If you are looking for a premium accessible theme, ask the developers about the theme accessibility before purchasing.
6. Use An Accessible Plugin:
If you’re unable to change your website’s theme, plugins are tools that can help you achieve your accessibility goals. By using a WordPress accessibility plugin you can make improvements to WordPress accessibility, without any coding. To make things easy on yourself, use a dedicated WordPress accessibility plugin to evaluate your site and make sure it’s accessible to all people.
Accessibility plugins don’t provide a guarantee to improve, screen, or solve all accessibility issues found on your site. They might audit the site, help you find the issues, and let you know where to make improvements. Or they may provide frontend tools to make creating an accessible experience on your site easier. Some multi-featured plugins may help you to optimize your site in several ways, such as removing unnecessary attributes that can confuse screen readers and adding labels to form fields. Plus, they add features you can use to more clearly describe images, shore up your navigation, improve color contrast, and so on.
Though there are tons of accessibility-focused plugins out there, you’ll need to be extra careful in your selection. You can choose one of them from WordPress.org. But don’t forget to test any plugin before committing to it.
Sum Up:
To make your site accessible, you must spend time researching common problems people have with certain disabilities. Remember, none of the above-mentioned components will guarantee that your website will be 100% accessible. However, if you employ these techniques, people with disabilities will be able to better access your site along with all of your other visitors.
We have tried to explain everything easily, hope now you will be able to make accessibility-ready websites with WordPress. If you have more techniques to make the WordPress website accessibility-ready, let us know in the comment section. We appreciate further comments, support, or suggestions!
Also to find helpful articles, visit our Blog page, subscribe to our YouTube channel, and follow our Facebook page.