Do you want to tell search engines what contents are on your website? An XML sitemap is a way that helps search engine bots to crawl and index your website faster so that it can enhance your web page accessibility. Moreover, as it assists to build a user-friendly website, everyone must know how to add and create an XML sitemap in WordPress.
Taking this in mind, in this article, we will describe the definition of an XML sitemap, it’s benefits, and how you can create an XML sitemap in WordPress.
So, let’s begin!
What is a Sitemap?
Nowadays, Sitemap is an important metric for search engine optimization that displays all the pages and posts of your website to the search engine. It gives a complete map of your website to both the search engines and your visitors.
There are two types of sitemap you can use for your site- XML sitemap and HTML sitemap in WordPress. The main difference between the two is that one works for search engines and the other for visitors.
As this tutorial is based on the XML sitemap, let’s know its definition and the advantages of using it on your website.
Definition of XML Sitemap
An XML sitemap is a document in an XML format that contains all your contents URL so that it eases the search engine for searching your pages.
It also informs the search engines when was the last time you update your website and what is the more important links of your website.
Basically, it will not directly bring your website higher in ranking but it will allow the search engine to easily crawls and index all content of your site.
Benefits of Having an XML Sitemap To Your WordPress Website:
- The main advantage of having an XML sitemap is that it enhances search engine crawl and indexability faster.
- Conveys the search engine about the time of the last modification that happened on your website.
- Informs the search engine how often you modify your content.
- Highlights which links/contents of your site are more valuable
To add an XML site map to your website, you have to follow two steps in WordPress. These are-
- Creating an XML sitemap
- Submit the XML sitemap to the Search engine.
How To Create an XML Sitemap in WordPress?
There are many ways you can apply to create the XML sitemap. You can create it manually or by using a WordPress plugin. If you don’t have much knowledge about coding, we will suggest you use a WordPress plugin to create an XML sitemap. With the help of the plugin, you can create it with just a few clicks.
In WordPress, there are a plethora of plugins you can use to create an XML sitemap. These are,
Among all plugins, Yoast SEO Plugin is one of the most common plugins we use for better ranking our website on search engines. But most people do not know that this plugin also gives a feature to create your website sitemap. If you are not using the plugin already, first you have to install and activate it from your plugin library.
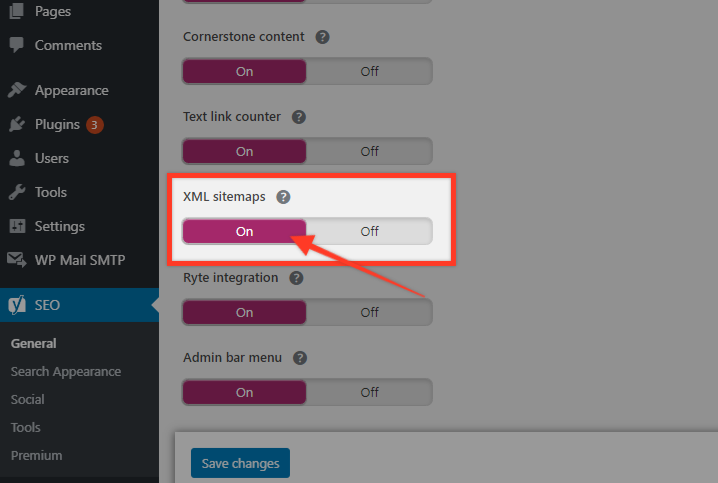
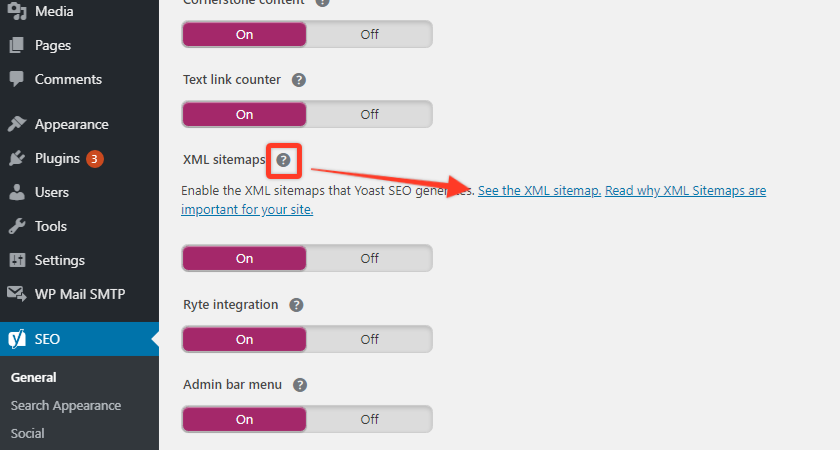
After activating the plugin, we will notice a new tab “SEO” appear on your admin dashboard. Now click on the SEO ►General option. In the General -Yoast SEO page go to the feature tab from the dashboard option.

From here, you will need to go to the tab of the XML sitemap and turn it on the XML sitemap. After that, to save the changes you have done, you need to click on the Save button.
Now, it’s time to verify whether the XML sitemap is created or not in WordPress.
To do this, click on the question mark(?) icon of the XML sitemap and then click the See the XML sitemap link to see the live XML sitemap.
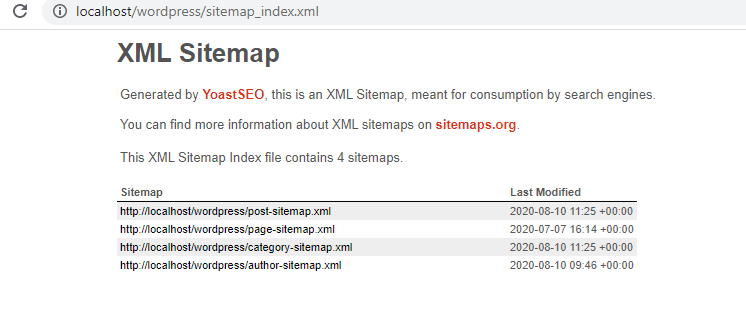
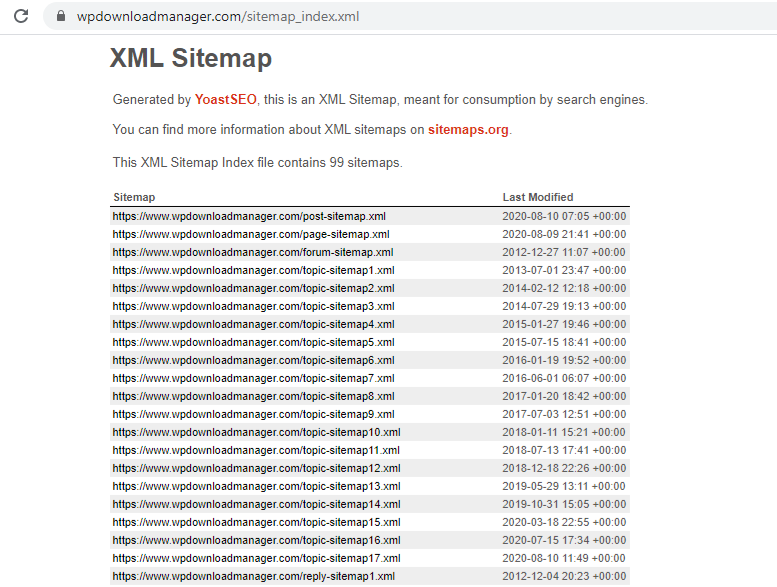
There is another way you can see your XML sitemap. You have to just search it by adding sitemap_index.xml at the end of your website domain.
For example, to see the XML sitemap of WordPress Download Manager, we have to find it as,
https://www.wpdownloadmanager.com/sitemap_index.xml
Submit the XML Sitemap To the Search Engine
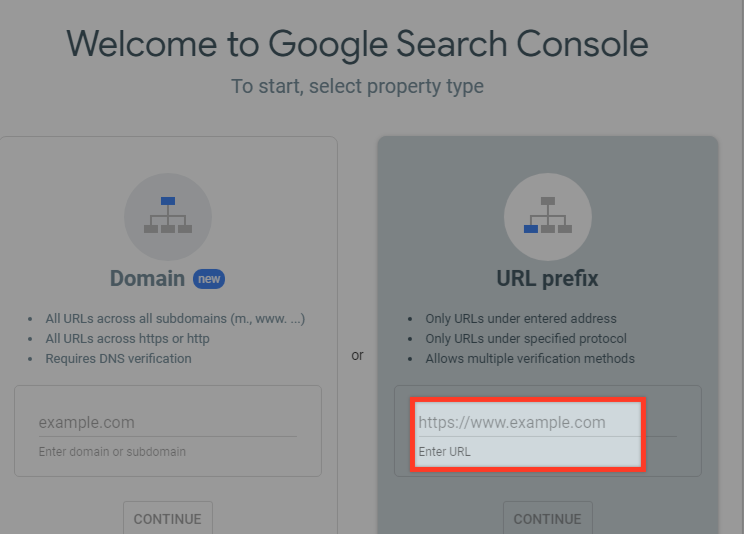
After creating the XML sitemap, it’s time to tell the search engine about it so that all your web pages and posts will index quickly. To do so, you have to use the Google Search Console tool.
In Google Search Console, you will need to signup with an account and then it will be required to verify the website ownership.
After verifying the ownership, to submit the sitemap, you need to go Index ► Sitemap in the sidebar. Next, you have to add your site’s sitemap to the Add a new sitemap field and click on the Submit button.
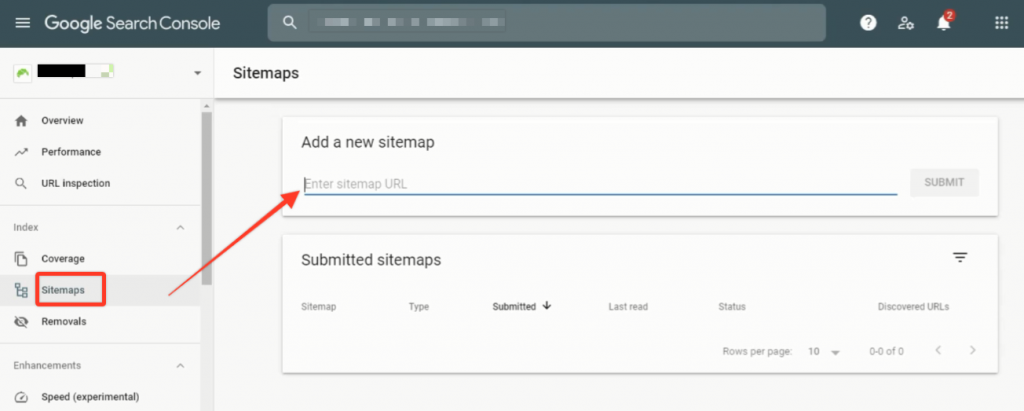
Then, Google will add the site map URL to your search console.
Now, You can see the basic sitemap status of your website from here.
Wrapping Up
No matter what your business is, every WordPress website needs an XML sitemap. It does not help your visitors but also the search engines to find all your content.
Hopefully, this tutorial will help you to understand XML sitemaps and how to create an XML sitemap in WordPress. To learn more about WordPress features and its tips & tricks, you may check our WordPress Tips and How-To section.
If this article will help you, then please subscribe to our YouTube channel to get more tutorials related to WordPress. You may join our Facebook page to update yourself with more tips, solutions, offers and so on.
You may also ask any questions related to it in the comment or want us to write on some specific topics you have in your mind. We appreciate your further comments, support or suggestions!