Debugging in WordPress is the method of identifying and removing errors in a code that can cause it to behave or crash unexpectedly. When you have issues with your WordPress website, allowing the debugging mechanism can help you to figure out what’s wrong. Once debugging is allowed, errors that were made on the page will become noticeable.
This article walks you through how to enable debugging in WordPress to detect errors in code.
Debugging in WordPress
When writing code in WordPress, sometimes the developer makes mistakes such as spelling and grammatical errors while typing the code. In the coding world, debugging is the process of going back and correcting those faults.
To enable the debug mode on your website you don’t need to spend much time by writing too many codes. You have to just edit a few lines in the wp-config.php file of your WordPress installation.
Now, Let’s take a look at how you can do it!!
How to Enable Debugging In WordPress?
To enable debugging mode in WordPress you have to follow the following steps:
Step 1: Login into your cPanel or hPanel
To enable the debugging mode first, you have to access your cPanel or hPanel. You can use the hPanel’s file manager or an FTP Client like FileZilla as you want. Here we will explain the process in the FTP client.
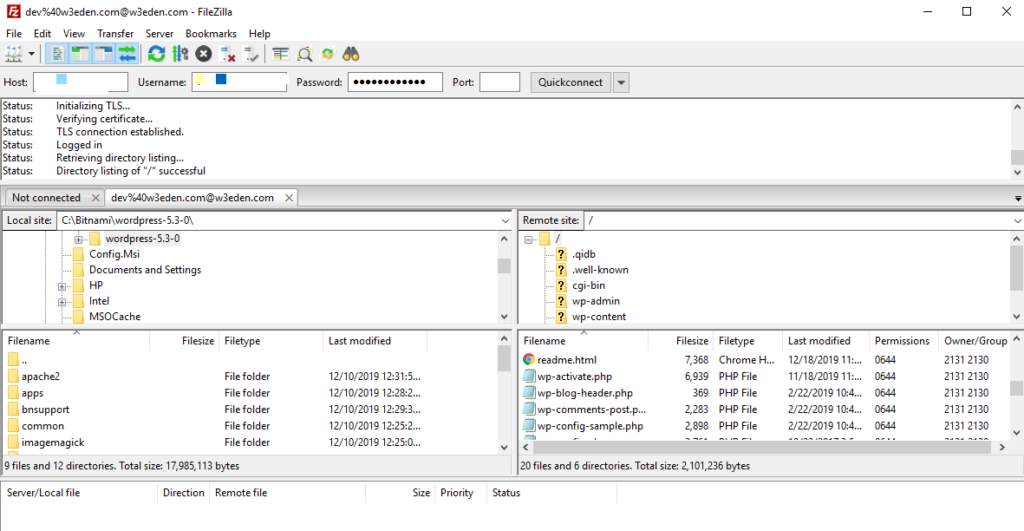
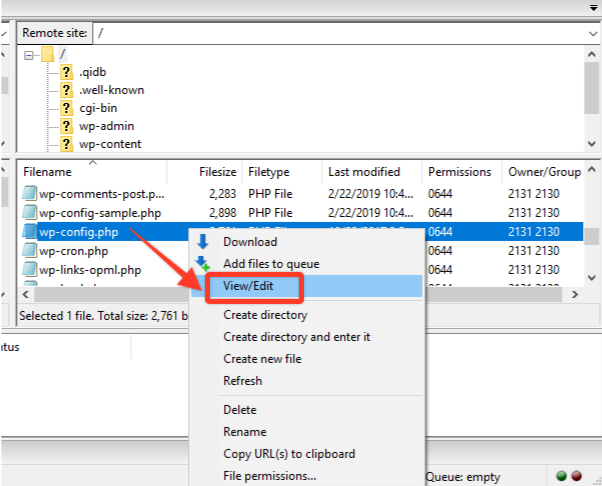
Step 2: Open the wp-config.php file in your WordPress directory
After opening your cpanel, you need to access File > Site Manager. Then choose the wp-config.php file and right-click on it and select edit or view in order to open it.
Step 3: Find the code as WP_DEBUG
In the wp-config file, you will need to find the following line of code –
define(‘WP_DEBUG’, false);
The WordPress debug mode is now disabled. To enable it, you’ll have to replace ‘false’ with ‘true.’ It looks like this –
define(‘WP_DEBUG’, true);
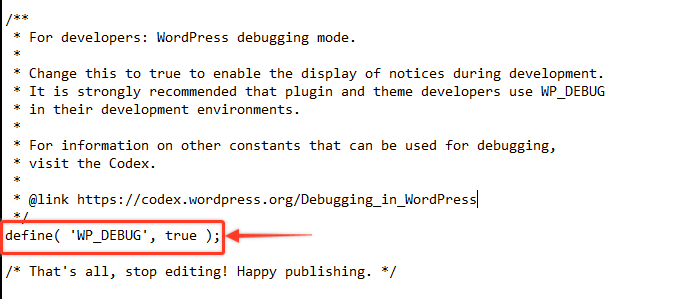
Then Save the changes that you have done and exit the editor. After completing the step you have now enabled WordPress debugging mode on your website.
Additional Options for Debugging in WordPress
WordPress also provides some additional options to make the debugging process more effective. These additional settings are given below:
WP_DEBUG_LOG
WordPress saves all the error information to the debug.log file when the WP_DEBUG_LOG option is enabled. This works along with the WP_DEBUG option in the wp-content directory.
To enable this setting, you need to add the following line to the wp-config.php file,
define( 'WP_DEBUG_LOG', true );
WP_DEBUG_DISPLAY
This setting allows you to view error and warning messages on your WordPress web pages. It also should work when WP_DEBUG is enabled. To enable the option you have to add the following code to the wp-config.php file,
define( 'WP_DEBUG_DISPLAY', false );
SCRIPT_DEBUG
This configuration allows you to use the “dev” versions of core CSS and JavaScript files in WordPress instead of the compressed versions. It is mainly used when you test any modifications to your built-in files. By default the setting is false. To enable it, you need to change it from false to true.
define( 'SCRIPT_DEBUG', true );
SAVEQUERIES
This setting displays all database queries made by WordPress when you enable query logging.
If you want to enable the options, you will need to add the following code to the wp-config.php file:
define( 'SAVEQUERIES', true );
Once you have enabled it, all the database queries you make will store in the global $wpdb->queries.
Conclusion
To wrap up, WordPress provides an easy method for fixing errors and faults on your website. Yet default debug mode is disabled. You may detect all program errors in a short time by enabling debugging on your WordPress website.
Hopefully, this tutorial helps you to fix your website errors efficiently. To learn more about WordPress, you may check our WordPress Tips and How-To’s to know more about WordPress.
If this article will help you, then please subscribe to our YouTube channel to get more tutorials related to WordPress. You may join our Facebook page to update yourself with more tips, solutions, offers, and so on.
You may also ask any questions related to it in the comment or want us to write on some specific topics you have in your mind. We appreciate your further comments, support, or suggestions!