Do you want to import/export your WordPress website data to create a new site or migrate users from your old site? Or, try to create backups of your content regularly.
Well, the built-in functionality of WordPress makes the import/export process extremely simple for you.
In this tutorial, I will explain to you how to import and export your content data on your own WordPress site with the built-in default feature of WordPress. First, let’s get started to know the main reasons for export/import content in WordPress.
Why do you need to export/import content in WordPress?
There are several situations when we have to export/import content in WordPress. These are-
- We all know moving a part of a site can be very time-consuming since you have to move each post or page from one site to another. But this built-in feature of WordPress makes your work quickly as moving all content at once.
- When you buy a website and want the content and user base to combine together then you must need to export/import all your data on WordPress.
- Sometimes your website is outdated and it needs to be modified. For this purpose, you can back up all your content with the help of the Export/Import tool of WordPress.
How To Export Data In WordPress?
Before importing data from one site, we should learn how we can export data because you can’t import anything without exporting it first!
Firstly, simply go to Tools → Export from your admin dashboard.
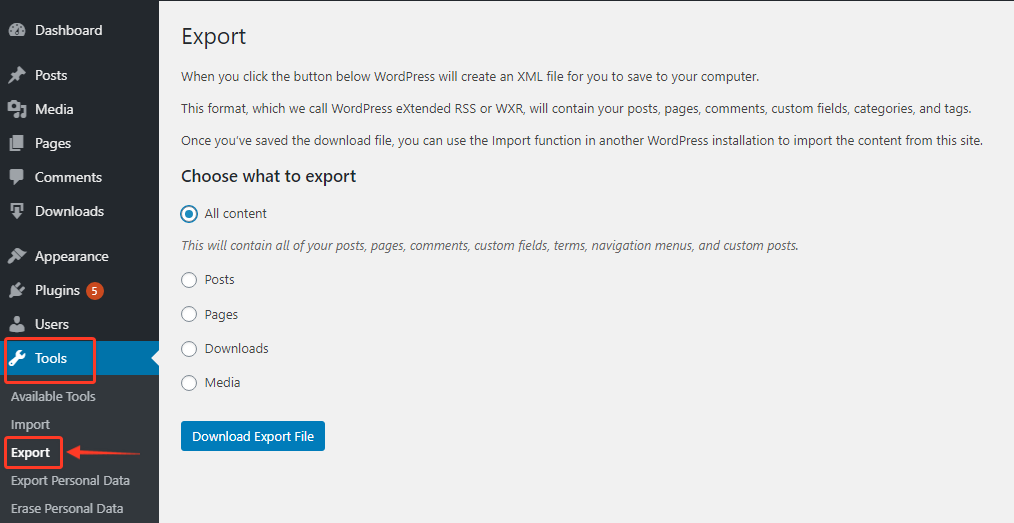
In the Export screen, you will see there are different options of content you can export from WordPress such as All content, Posts, Pages, Downloads, and Media. You will choose what type of content you want to export.
If you choose one type e.g. posts there are more options to filter the export by selecting the category, author name, start date, end date, and status (published, scheduled, draft, pending, private, etc.)
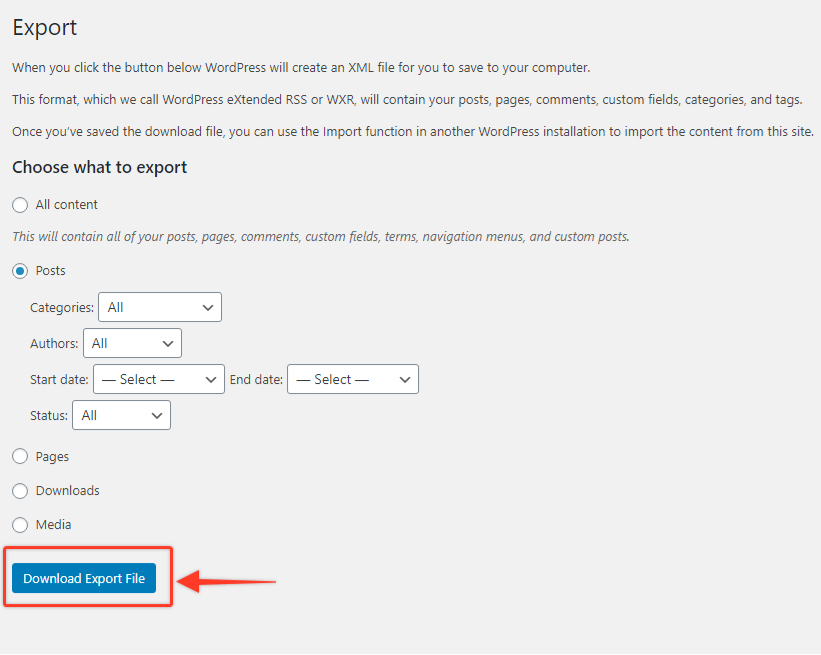
Once you select the type of content you want to export, click the Download Export File button. After clicking the button, WordPress will create an XML file for you to save to your computer. With this saved file you can use the import function in another WordPress installation to import the content from this site.
How To Import Data In WordPress?
Import options for WordPress can also get under Tools in the main admin menu. However, the import functionality is not a built-in feature of WordPress.
At first, simply go to Tools → Import from the Admin dashboard.
Here you can import your files in WordPress from various types of content formats such as
- Blogger
- Categories and Tags Converter
- LiveJournal
- Movable Type and TypePad
- RSS
- Tumblr
- WordPress
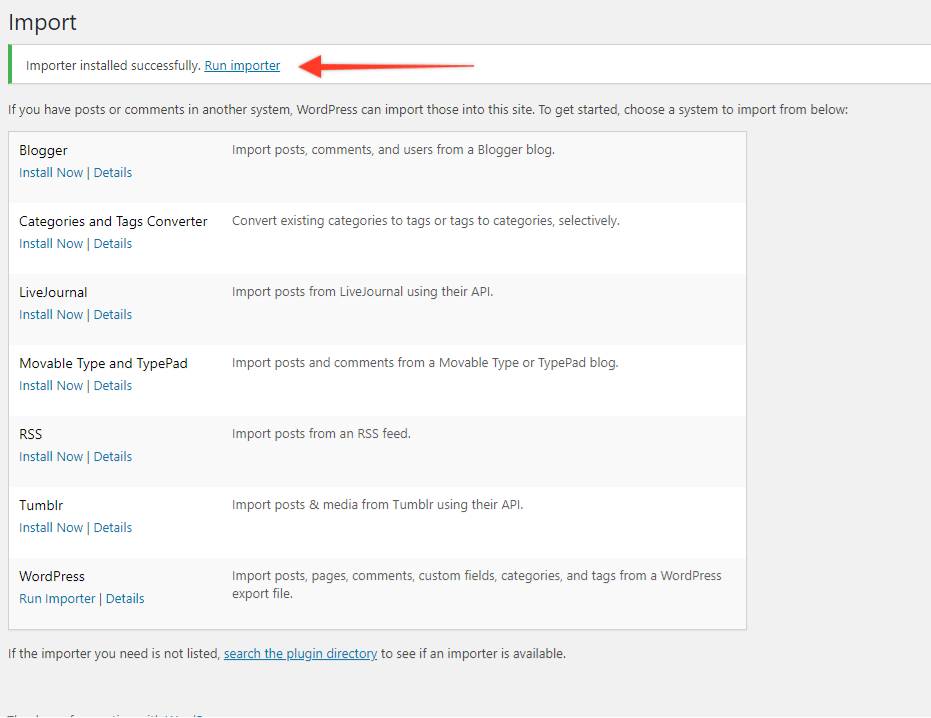
Each one has a different importer plugin to import the files. You have to just click on Install Now button to download and Run Importer to import it.
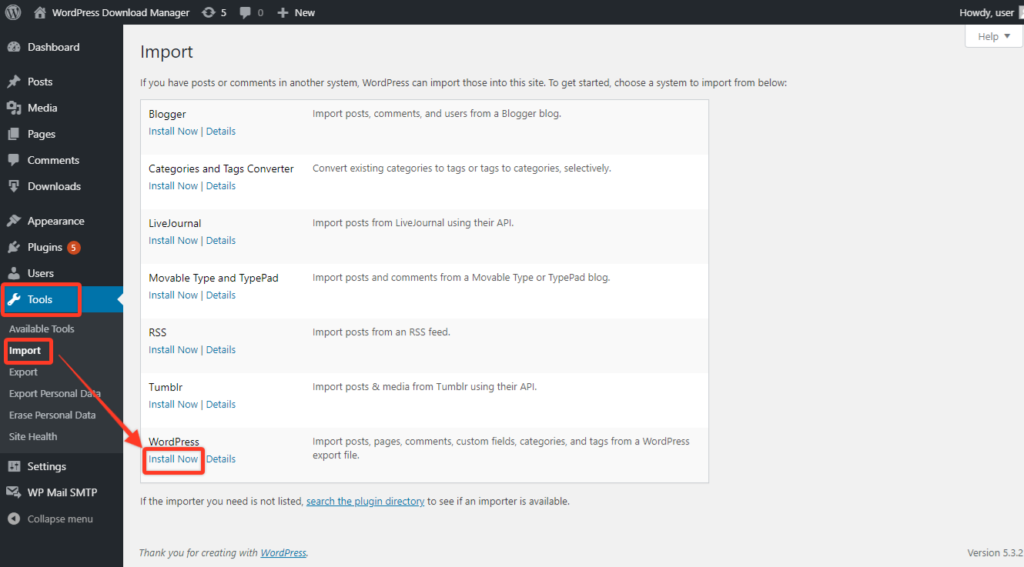
As we are importing content from another WordPress website, so we need to install the WordPress importer from Install Now button and after that Run importer to import the contents. Thus, you have successfully activated the plugin.
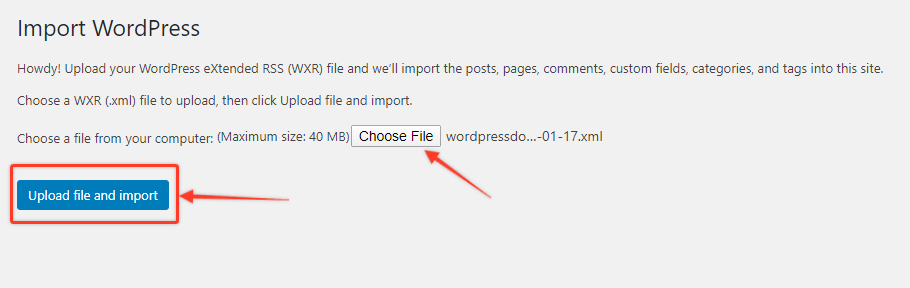
Once the plugin has been activated, you will view an Import WordPress page. Here you can upload the XML file which you exported earlier using the Choose File option. After choosing the XML file from your computer, click on the Upload file and import button.
After that, you will be taken to the Assign Author page where you can edit and save the imported content or reassign the author of the imported item to an existing user of this site.
Moreover, you can create a new user account for each author’s post or assign the post to an existing user here. Furthermore, it has the option to check or uncheck the box of Download and import file attachments which will import all of the attached images of your importing contents.
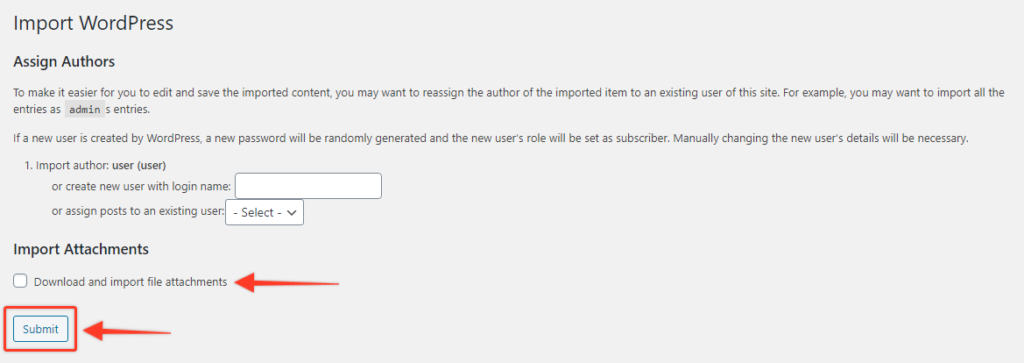
At last, click the Submit button and now your all content will be imported into your website.
When the import is complete, it will appear All done. Have fun! button. Now, click on it and go back to your WordPress dashboard.

Conclusion
That’s all. Hopefully, through this article, it’s now easy for you to export/import content from one website to another website.
If you need more information related to this topic, feel free to ask in the comments section below. Also, you may check our WordPress-related content to get some useful tips and tricks related to WordPress.
If this article will help you, please subscribe to our YouTube channel to get more tutorials related to WordPress. You may join our Facebook page to update yourself with more tips, solutions, offers, and so on.