
Accepting file uploads is a great way to collect your users’ information and build better communication between you and them. There can be many other reasons a site owner may want users to be able to upload files on your WordPress site. But WordPress doesn’t let you allow your users to upload files to your website, especially from the front end. Only site owners can upload, edit, and share, and users are just spectators and viewers.
What will you do if you have a client, site authors, or other users who need to submit files?
Luckily, WordPress Download Manager came up with the new DropZone feature.
In this article, we are going to introduce you to the Dropzone feature and let you know how it works.
What is DropZone?
DropZone is a feature to allows your users to upload and share files on your WordPress website. With this feature, you can allow your users to upload every type of file. Its easy-to-use interface not only makes file uploading hassle-free for your users but also helps you to manage those files most conveniently. You can manage which file extensions to allow on your website from your WordPress Download Manager settings option.
Though there are thousands of file-uploading plugins in the WordPress repository, you don’t need to install an additional plugin to get this feature. Download Manager Pro gives you the DropZone feature completely free.
Why Do You Need DropZone?
Enabling the dropZone feature, can streamline your file submission process and ensure a quality user experience. There are numerous reasons file upload is useful and even benefits your site. Here are some examples:
Collect User-Generated Content: With the file upload feature, you can allow your users to submit videos, audio, images, or any other file. Which will help you to collect data from people with various tastes and add more value to your content.
Allow File Upload for Giveaways/ Contest: Through the DropZone feature, you can allow users to easily upload files for any giveaway or contests on your website. This feature will also help you to easily manage the content uploaded by your users.
Accept Guest Post: DropZone allows you to receive a guest post from your users and helps you deliver new perspectives and fresh content to your audience.
Lastly, user engagement is very important for a successful business. The more your users will be allowed to share, the stronger connection they will have with your business.
How to Allow Users to Upload Files in WordPress?
WordPress Download Manager is a versatile file management plugin. Its multiple file protection systems differentiate this plugin from any other file management plugin. To get started with DropZone, check the WordPress Download Manager pricing list and select your plan. Once you get your License Key, install and activate the plugin.
Step 1: Add DropZone Shortcode:
First, go to “Pages > Add New” on your WordPress admin dashboard and create a page. Now copy and paste the following shortcode and publish the page.
[wpdm_dropzone]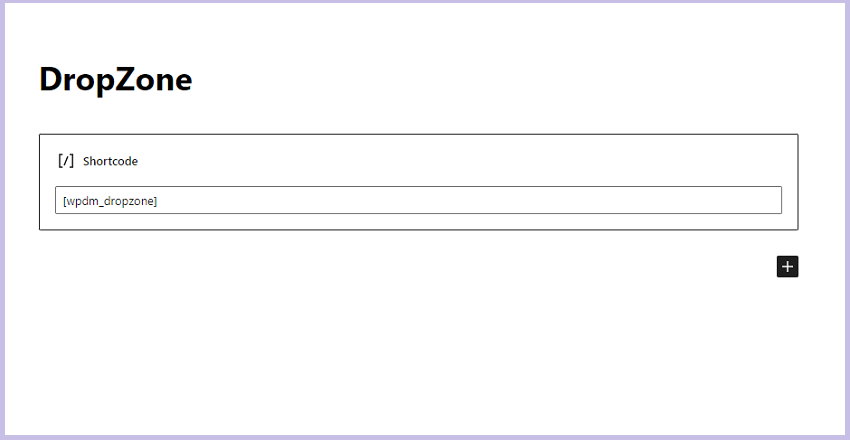
Step 2: Customize Your File Upload Option
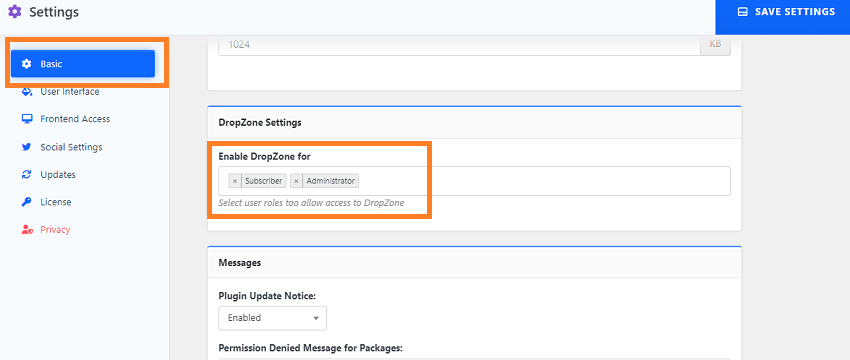
It’s time to allow your users to upload files. For that, go to “Downloads > Basic > DropZone Settings” and select the user roles you want to receive files from.
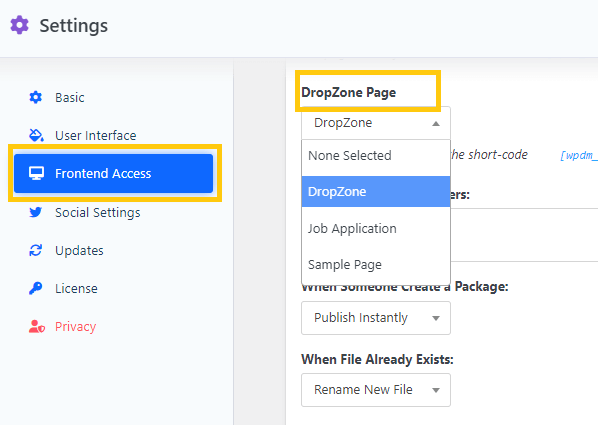
Next, navigate to the “Downloads > Settings >Frontend Access” page. There are several settings options you need to change on this page. First, check the “DropZone Page” option on the “Front-end Settings” section and select the page where you have pasted the DropZone shortcode.
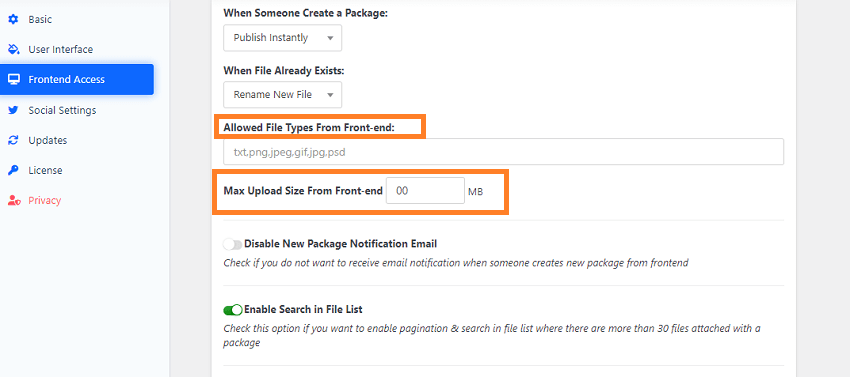
Now, to avoid accidentally or maliciously uploading inappropriate files by your users, checking the file type and size is a good start. For that, select the file type you want to allow by adding the file extensions on the “Allowed File Types From Front-end” option. Also, set the file size limit from the box beside the “Max Upload Size From Front-end”.
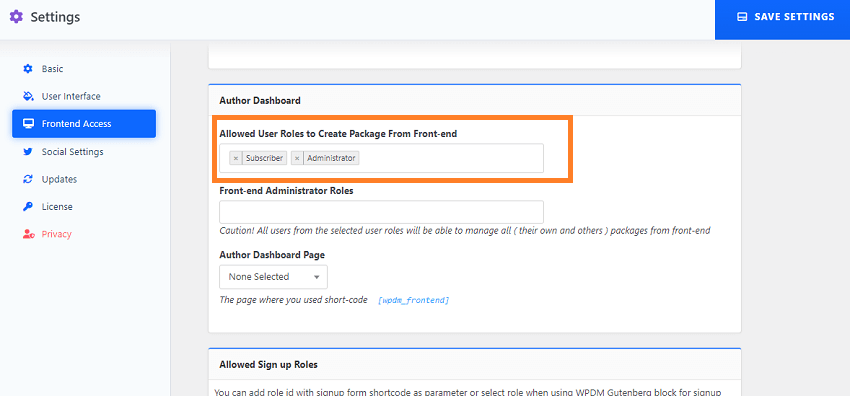
Note: If you haven’t already allowed your users to create packages from frontend, you need to do that. Otherwise, your user will not be able to upload files even after you allow them on the DropZone settings. So, go to “Downloads > Settings >Frontend Access”, scroll down to “Author Dashboard” and select user roles who can create packages from the frontend.
Finally, you have configured your DropZone perfectly. Now, your allowed users will be able to upload files on the DropZone.
Step- 3: Manage Your Files
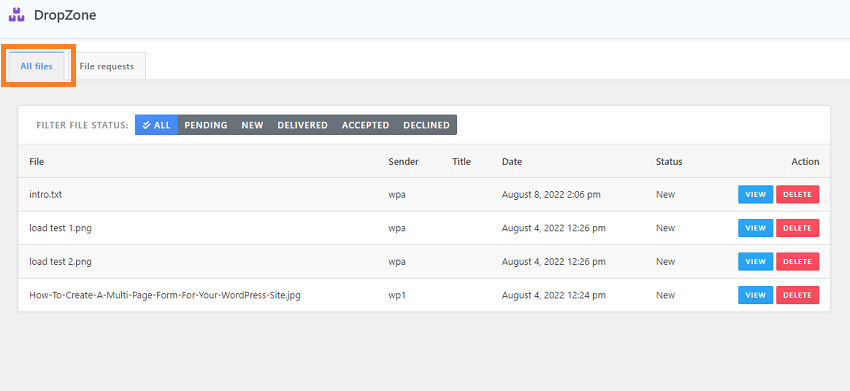
Another amazing fact about the DropZone feature is that it gives you a super easy dashboard for managing uploaded files. Just go to the “Downloads> DropZone > All Files” tab, here you can check and manage the files your users have uploaded.
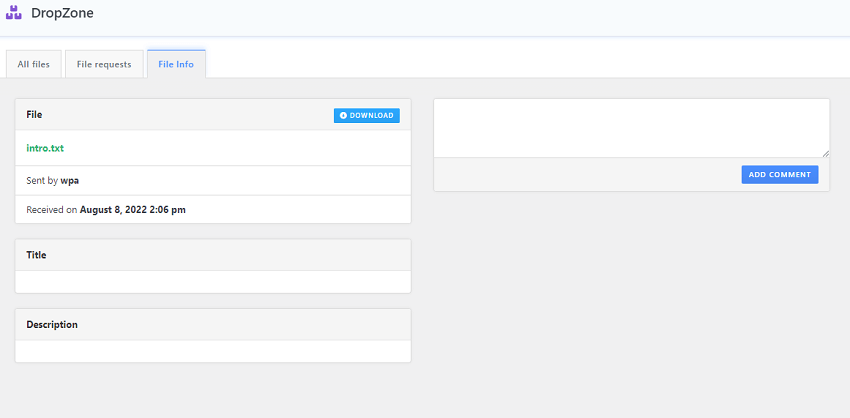
To check each file’s details, click on the “View” button on the right side of the file. Here you will not only see the details but also can add comments on the file.
DropZone Frontend:
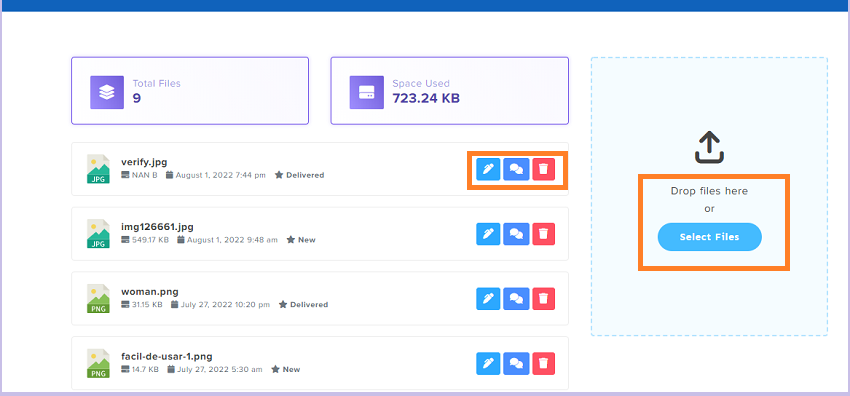
DropZone is best for its flexibility and user-friendliness. Users only need to drag and drop the file or browse the file to upload it. DropZone even allows your users to manage their uploaded files. They can edit the file, check comments on the file, add comments and delete the file even after uploading it.
Send Individual File Requests to Your Users:
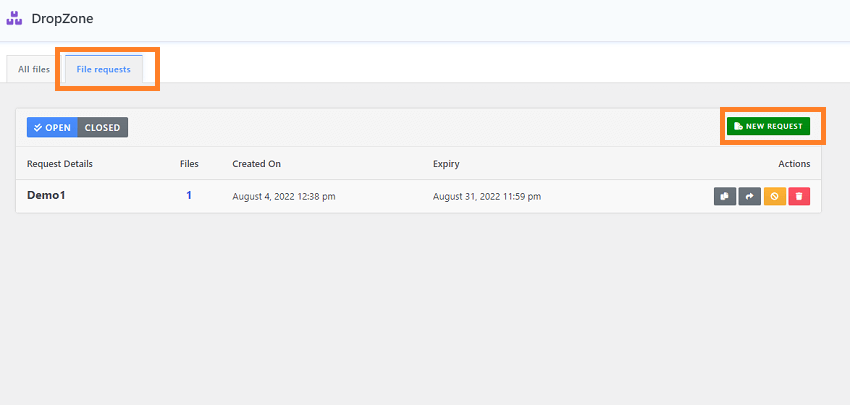
Now, that’s not the end! DropZone comes with a most exclusive feature, which is “File Request”. If you want to get files from a specific user(s), this option allows you to do so. For that, go to the “File Request” tab and click on the “New Request” button in the upper-right corner.
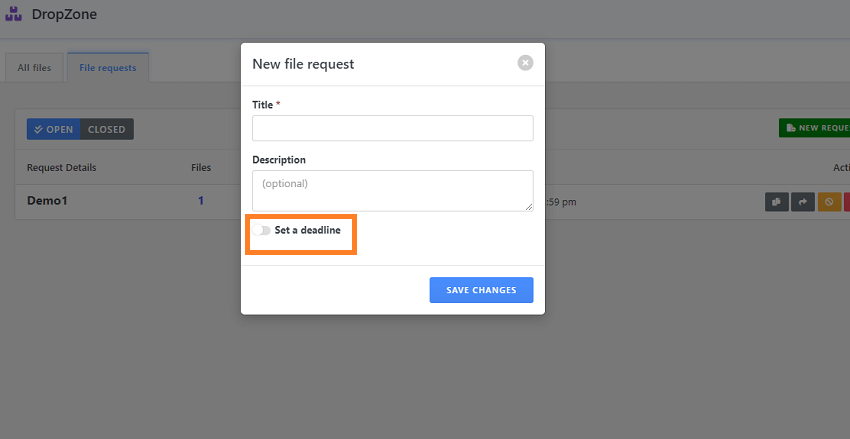
Now, a pop-up menu will appear. Just add the title for the request and any description if you need it. You can also set a deadline for the file request, turn “ON” the toggle button.
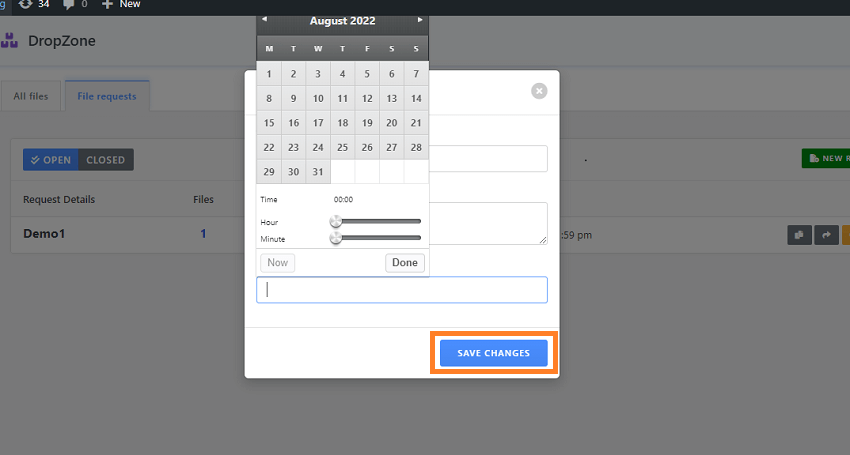
Next, you will see options to set the time and date for expiring the file request. Set the date and time and click on “Save Changes”.
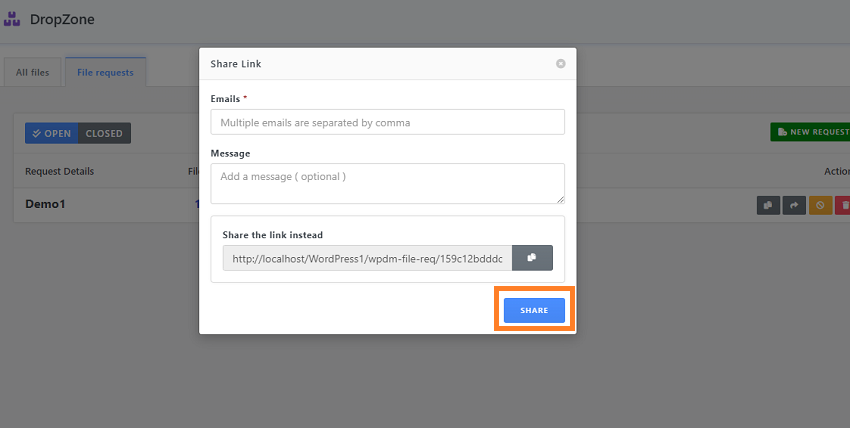
Once you are done creating a file request, you can share the file request link with anyone you want. Just click on the “Share” button from the right side of the file request option, enter the user’s email and any details about the file request, and click on the “Share” button.
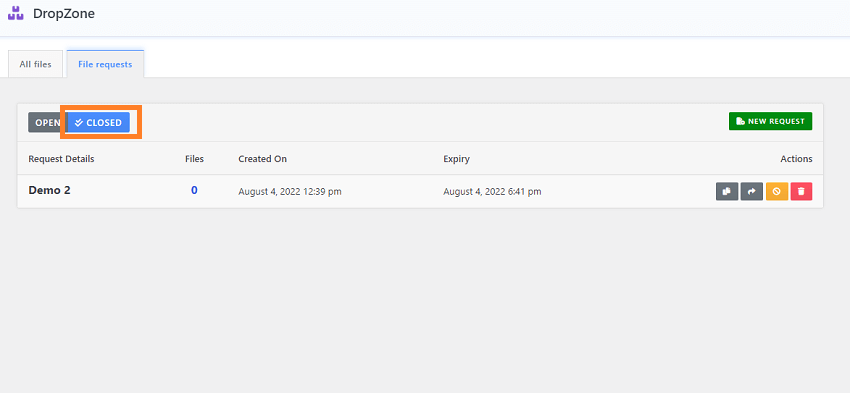
To manage your file requests easily, you will get two different tabs “Open” and “Closed” on the File Request option. To check file requests that crossed the deadline, you need to click on the “Closed” tab. Because once your file request crosses the deadline it will automatically transfer into the “Closed” tab.
Conclusion:
WordPress frontend file upload option is a great idea for website owners. In this article, we introduce you to the most professional way to allow our users to upload their files to your WordPress site. So what are you waiting for? Get your copy of WordPress Download Manager Pro and activate the DropZone feature.
Visit our Blog page for articles on trending topics. Also, don’t forget to follow us on Facebook and subscribe to our YouTube channel to stay updated.

2 Comments
Hello,
Let’s say a user is uploading a file. The file should be in “pending” until is approved by admin. How could I do it and this status can be seen in the dashboard of the user?
Thank you!
If you are talking about adding and publishing packages from front-end, that can be handled by another shortcode `[wpdm_frontend]` ( Demo: https://try.wpdownloadmanager.com/frontend-uploader/ ). From plugin option, you can keep the status “Pending Review” for the packages created from front-end. You can review and then publish them.