Keep Your WordPress Site Secure from Hackers (15- Steps)
As WordPress is very beginner-friendly and easy to learn, its popularity growing tremendously. With the growing popularity, WordPress websites in particular have become a favorite of cybercriminals. Most of the time hackers go after specific and popular websites to achieve a very specific goal. But that doesn’t mean if you have a small and unpopular WordPress site then your site is secure from them. Hackers like to take advantage of relatively inexperienced users and breach new websites. So, if you have a small or popular website, you also have to take certain precautions. Otherwise, you could get hacked.
Now, if you are looking to learn how to secure your WordPress site from hackers, you have come to read the right article. In this article, we will talk about various security measures we can take to protect WordPress sites from getting hacked. So, let’s check the 15 steps you should take to keep your WordPress site secure from hackers.
Step-1 #Scan WordPress for Malware and Vulnerabilities:

Malware gets worse with time, as hackers get time to spread malware through your website, steal your data, and infect devices and other websites. So detecting malware as soon as possible is the first pillar of your WordPress site security. If there is a sudden drop in your website traffic or search rankings, some suspicious behavior or strange performance issues then go and run a manual malware scan. If you detect malware, then clean it immediately. Some malware can even modify themselves to avoid security detection so webmasters might not be even aware that anything is wrong. That is until the damage is done. That’s the reason, it’s a good idea to run a malware scan every once in a while even if your site is running fine.
Fortunately, there are multiple plugins and malware scanners that can scan your site. Those tools have varying levels of efficacy. However, most of them use a signature database and compare the code on the website. If there is any match to the signatures, the code is flagged as malware. Remember that, no security scanner can remove the malware or clean a hacked WordPress site. They will just scan your website.
Step-2 #Install a Security Plugin:
A security plugin takes care of your site security, scans for malware, and monitors your site 24/7 to check what is happening on your site regularly. They come with many bells and whistles to cover most of your security needs. Even though almost all WordPress security plugins claim to secure your WordPress site, we are recommending searching the following features before choosing your one:
- Generate and force strong passwords when creating user profiles
- Force passwords to expire and be reset regularly
- User action logging
- Easy updates of WordPress security keys
- Malware Scanning
- Two-factor authentication
- ReCaptcha
- WordPress security firewalls
- IP whitelisting
- IP blacklisting
- File changelogs
- Monitor DNS changes
- Block malicious networks
- View WHOIS information on visitors
There are lots of security plugins available in the business with the above-mentioned features. These are the top WordPress security plugins to consider:
Most of the security plugins highlighted above have free versions available. You can always start with a free version of the plugin and upgrade to premium once you’ve been able to explore all the features and see how well it protects your site. But if you’re serious about securing your site, then upgrading to the premium version is a worthwhile investment.
Step-3 #Install a FireWall:
A web application firewall, also known as a website firewall acts like a filtering mechanism that all your website traffic passes through it before reaching your site. Which filters out bad traffic or even hacking attempts and only lets the good traffic reach your site. Without the filtering mechanism, installing a firewall on your site offers many more benefits. They protect your site against SQL injection attacks, remote code execution, spam injection attacks, and cross-site scripting attacks. You can set up rules for who can access your site and who can’t, making Your WordPress website more secure. It also monitors and manages network traffic. You can block IPs and users, even whole countries that are blacklisted or have tried to harm your site in the past.
There are different types of website firewalls, categorized by where they are installed and how they work. MalCare and Sucuri are the most effective firewalls loaded before WordPress, so they can filter out all the bad traffic. Firewalls at the plugin level, like Wordfence, can filter out most of the bad traffic, but not all of it. So, carefully deliberate which type of firewall works best for your needs before choosing.
Step-4 #Install SSL Certificate:
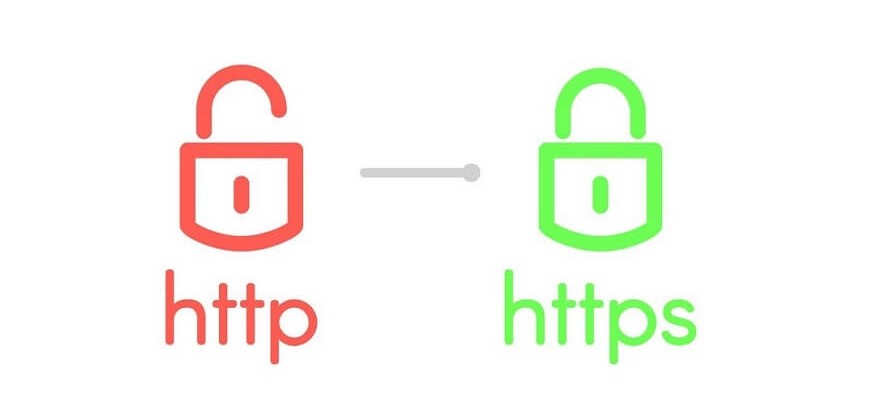
In July 2018, Google announced all non-HTTPS sites as “Not Secure”. Since then the HTTPS protocol has become an official and quite mandatory web standard, for what concerns best practices and data safety. Websites with an SSL certificate installed only use HTTPS instead of HTTP. SSL stands for Secure Sockets Layer. It is a technology that encrypts connections between your website and visitors’ web browsers, ensuring that the traffic between your site and your visitors’ computers is safe from unwelcome interceptions. That means all the data that passes through is encrypted and private, preventing hackers from stealing information.
SSL is beneficial for all kinds of websites. Especially when you have a lot of people who log into your site. If you have an e-commerce site or other sites that handle sensitive data like credit card information, it’s mandatory to install SSL for security. If you don’t enable SSL, Google Chrome will warn users, which will directly make a bad impression and reduce website traffic. Also, SSL enabled site shows a padlock sign next to your website address in the browser, which makes your users feel safer.
On the other hand, enabling SSL will not only increase your site’s security but will also benefit your search engine rank. Even it can improve your site speed. Because by default it uses the HTTP/2 protocol. Nowadays many hosting companies offer free SSL certificates for WordPress websites. If your hosting company does not offer one, then you can enable it using the ‘Really Simple SSL’ plugin. For more details check How to Enable HTTPS (SSL Certificate) For a WordPress Website.
Step-5 #Use Secure WordPress Site Hosting:

Even though server-side security plays a key role in keeping your site safe from hackers and malware. While choosing the host, we check many factors, and ignore the security part. For making your WordPress site secure, security should be a top priority while choosing the host. A secure WordPress site hosting provider should guarantee a safe space for all your website data and files on their server. If your hosting provider serves poor account configuration and management where users can install and create as many sites as they want, they will be a prime target for malicious intruders.
Now, if you think your current web hosting company is not secure enough, migrate your WordPress site to a new hosting platform as soon as possible. But most of the time we don’t even know if our host is taking our website security seriously enough or not, so it’s critical to choose the one that has an excellent security level. For that, we should be looking for a host that offers the following services:
- Reviews and ratings
- Support
- Customization
- Loading time
- Backups
- Up-to-date server software
- Malware monitoring and removal
- Firewalls and other security measures
Step-6 #Change Your Database Prefix:
By default, the WordPress Database contains 11 tables and uses wp_ as the table prefix for all of them. Using the default database prefix makes it easier for hackers to guess what your table name is. Which makes your site database prone to SQL injection attacks. But you can prevent such attacks by changing “wp-” to some other term.
When you install WordPress it asks for a table prefix and it is the ideal way to change the database prefix. However, there are also ways to change the WordPress table prefix on existing installations. Plugins like WP-DBManager or iThemes Security can help you to do that with just a few clicks. You can also change it by SQL command. But it’s a little bit tricky so we prefer to use plugins.
Step-7 #Use Latest PHP Version:
Although WordPress technically works with some older versions of PHP, you may sacrifice security, performance, and compatibility. New versions of PHP come with performance enhancements and vulnerability fixes. That’s why it’s important to update your PHP version to the latest one.
The currently supported versions are 8.0 and 8.1, so it’s highly recommended that you are on one of these. However, there is no option to update your PHP version on your WordPress dashboard. But you have several methods to update it, as all the top WordPress hosting companies allow you to do so. Check Update Your PHP Version in WordPress, to know more about PHP updates.
Step-8 #Hide Your WordPress Login URL:

Like everyone, hackers know that to log in to the WordPress website, all you need to do is add “/wp-admin” at the end of the site’s URL. Even sometimes hackers use bots that are configured to attack a site with a typical setup. Guessing a custom login URL is way harder for hackers. But if they can’t find your login page, chances are the bots will move on from your site. Therefore, changing your WordPress login URL is the easiest way to prevent the majority of these attacks.
However, by no means changing your WordPress login URL can be a go-to security measure against more advanced hackers. But it is simply one little trick that can help protect you. To change your WordPress login URL we recommend using the free WPS Hide login plugin. You just need to fill in the Login URL field with your custom login URL and click the Save Changes button to finish the process.
Step-9 #Use Two-Factor Authentication:
Two-factor authentication is an extra layer of security for your website’s login. Usually, you need a username and password to log into your website, and the username is often your email address. This means, if an attacker knows your email address, they only have to guess your password to gain access to your site. Two-factor authentication ensures the true identity of a user on your website by requiring more than a password to log in. It involves a two-step process in which you will be verified by a secret question, a secret code, a set of characters, or more popular, the Google Authenticator app, which sends a secret code to your phone. This way, only the person with your phone can log in to your site.
In most cases, two-factor authentication is 100% effective in preventing brute-force attacks on your WordPress site. Because it is almost impossible that the attacker will have both your password and the second device. Even top online websites like Google, Facebook, and Twitter, allow their users to enable two-factor authentication for their accounts. You can enable two-factor authentication on your WordPress site using plugins such as Google Authenticator and Two Factor Authentication.
Step-10 #Limit Login Attempts:

By default, WordPress allows users to try to log in as many times as they want. But this leaves your WordPress site vulnerable to brute-force attacks. Hackers can target your website by trying to crack username/password combinations millions of times until they break in. So to secure the WordPress login process and harden the security even further, then you should consider limiting the number of times a user can input their login info. Limiting the number of times a user enters the wrong credentials in a certain amount of time will prevent hackers from brute-forcing a login.
Some hosting services and firewalls might take care of limiting login attempts. However, if you don’t have the firewall setup, then you can also install a plugin for the job. There are many great plugin options available, such as Limit Login Attempts Reloaded, Login Lockdown, Loginizer, etc. Those plugins work almost similarly. They record the IP address and timestamp of every failed login attempt. If more than a certain number of attempts are detected within a short time from the same IP range, then the login function is disabled for all requests from that range. For example, you can limit the number of login attempts to 3 times. So, after the third attempt, the plugin will send you a notification of that user and their IP addresses. You can even ban specific IP addresses if it becomes a persistent issue.
Step-11 #Log Idle Users Out Automatically:

Most of the time users forget to log out of the website and leave their sessions running. If the users use a public computer, someone else who uses the same device access can their user accounts and potentially exploit confidential data. Even, hackers can hijack inactive users’ sessions, who are still logged in to your WordPress back-end. They can modify credentials and make changes to critical files. That’s why logging out idle users automatically is the best practice for your site security.
You can set this up by using a plugin like Inactive Logout. This plugin allows you to set a customized time limit for idle users, after which they will automatically be logged out. It also allows sending a custom message to alert idle users that their website session will end soon.
Step-12 #Hide Your WordPress Version:
The less your WordPress site configuration is known to people the better. So hiding your WordPress version is a small, yet important security measure. By default, the WordPress version shows up in the header of your site’s source code. But, Once hackers reach your website, the first thing they look for is its version number so that they can tailor an attack to target a known vulnerability of that version. If they see you are running an out-of-date WordPress installation, this could be a welcome sign to intruders.
To protect your website from these attacks, you can simply hide your WordPress version number. You can hide your WordPress version by adding the following code to your functions.php file:
function wp_version_remove_version() {
return '';
}
add_filter('the_generator', 'wp_version_remove_version');
The alternative is using a premium plugin like Perfmatters to hide your WordPress version with a simple toggle.
Step-13 #Block All Hotlinking:

Suppose, you uploaded an image on your website and someone found it on the internet randomly and used the image URL directly on their website, that’s called Hotlinking. With hotlinking enabled the image remains on your server and all traffic that comes to the other site uses your server resources. Every time someone views the hotlinked image, it eats up your server’s bandwidth which you’re paying for. In such a case not only are they stealing your image but also your bandwidth. Hotlinking also results in performance issues because the other website is hogging your server storage to show the image on its own site.
So, to protect your site from hotlinking, disable your hotlink. Keep in mind that hotlink protection won’t hurt your website’s presence in search results. To prevent hotlinking, you can use an FTP client, a WordPress security plugin, or a CDN, or edit the control panel’s settings. But before that, you need to check if your content was hotlinked, type the following query in Google Images, replacing Example.com with your domain name:
inurl:Example.com -site:Example.comStep-14 #Disable XML-PRC:

XML-RPC is a feature of WordPress that enables a remote device to send data to your WordPress website. Suppose, if you want to publish an article on your WordPress website via the WordPress application, XML-RPC is what enables you to do that. Initially, a manual WordPress installation had XML-RPC disabled by default. From version 3.5 onwards, WordPress has it enabled by default, and the option to enable or disable it was removed.
Though it’s a helpful feature, sometimes it can open doors for brute force attackers. When you want to publish content from a remote device, an XML-RPC request is created. Which is authenticated with a simple username and password. If a hacker manages to get their hands on these credentials, they could use it to send their own requests and can gain access to your site. Moreover, XML-RPC is designed for users to publish content in large volumes. This enables brute force attacks wherein hackers use bots to try to guess your username and password. By disabling XML- RPC, you will ensure that the function cannot be used to hack your WordPress site.
Before disabling XML-PRC, you need to determine whether XML-RPC is enabled. For that, run your site through an XML-RPC validation service and see whether you receive a success message. If you find your XML-RPC enabled, you can disable the XML-RPC function either by using a plugin or manually.
Step-15 #Disable File Editing:
WordPress comes with a built-in code editor feature that allows you to edit any files that are part of your WordPress installation (including theme and plugin files). This gives attackers an easy way to alter your files if they gain access to your account. For this reason, we suggest deactivating this feature.
Disable this feature by adding the following code to your wp-config.php file:
define(‘DISALLOW_FILE_EDIT’, true);If you disallow file editing, no one will be able to modify any of the files. Disabling file editing won’t necessarily prevent attackers from doing damage, but it can confuse less experienced hackers and stop them in their tracks. At the very least, it’ll make it a little more difficult for them and give us more time to realize something is wrong.
Final Thoughts:
There’s no one foolproof security measure that can assure you to fully secure your WordPress site from hackers. But, by following the steps we recommended, you can make it harder for hackers to hack your site. However, securing your site is not a one-time task, is an iterative process. You need to continuously practice security measures since cyber-attacks are ever-evolving. Also, to make your WordPress life hassle-free, religiously perform WordPress Maintenance Tasks.
Do you have any WordPress security tips that we missed? Feel free to let us know in the comment section. We appreciate your further comments, support, or suggestions!
If this article helps you, please subscribe to our YouTube channel to get tutorials related to WordPress. Also, follow our Facebook page to update yourself with more tips, solutions, offers, and so on.

