
In an age where the effective management of time and resources is crucial, automating repetitive tasks is a boon. Cron, a time-based job scheduler in Unix-like operating systems, is one such tool that can run specified commands or scripts at fixed times, dates, or intervals. Many web hosts offer creating corn jobs with cPanel and Plesk Parallel as an interface for managing server tasks, including setting up Cron Jobs.
This guide will walk you through the steps of creating a cron job using cPanel and Plesk Parallel. It’s worth noting that we’ll be focusing on the most recent versions of these platforms as of 2023.
What are Cron Jobs?
Cron jobs are automated scripts run by your server at specified intervals. These can be used to schedule tasks like data backups, system maintenance, or sending out newsletters. The name “cron” comes from the Greek word for time, “chronos”.
Creating Cron Jobs with cPanel
The process of creating a cron job with cPanel involves several steps.
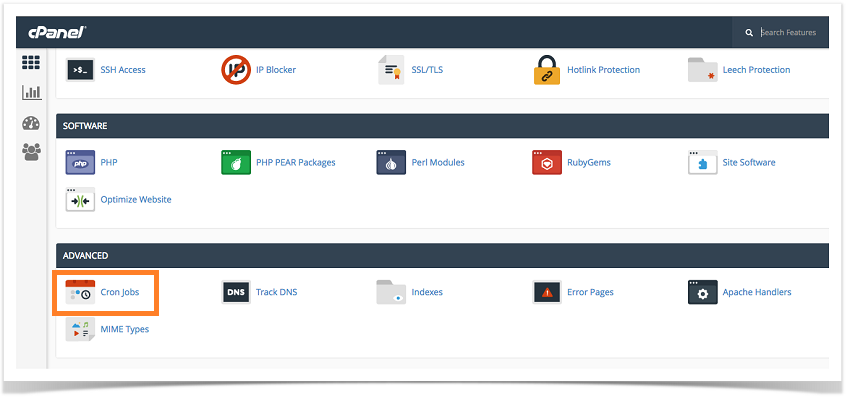
Step 1: Accessing the Cron Jobs Feature
Log in to your cPanel dashboard and look for the “Cron Jobs” feature under the “Advanced” section.
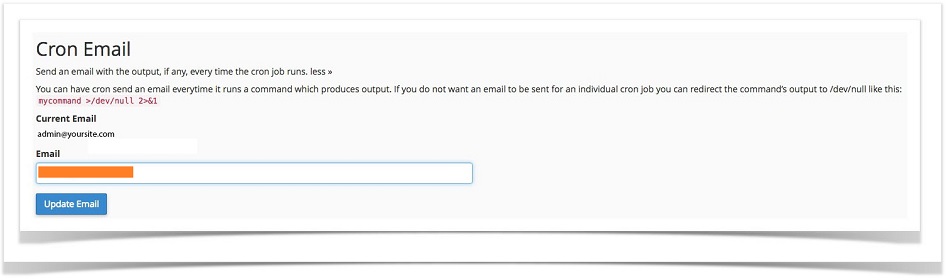
Step 2: Setting up a Cron Email
You can choose to receive an email every time a cron job runs. Enter your email address in the “Cron Email” field. This is an optional step but is recommended for monitoring.
Step 3: Configuring the Cron Job
The “Add New Cron Job” section is where you’ll define when and how often your cron job will run. cPanel offers several common settings (e.g., “Once Per Minute”, “Once Per Hour”) for easy setup.
Next, in the “Command” field, enter the command or path to the script you want to run. For example, to run a PHP script, you’d use:
php /home/username/public_html/cron.php.To run cron from URL you can use CURL, like:
curl "https://cron-job.url"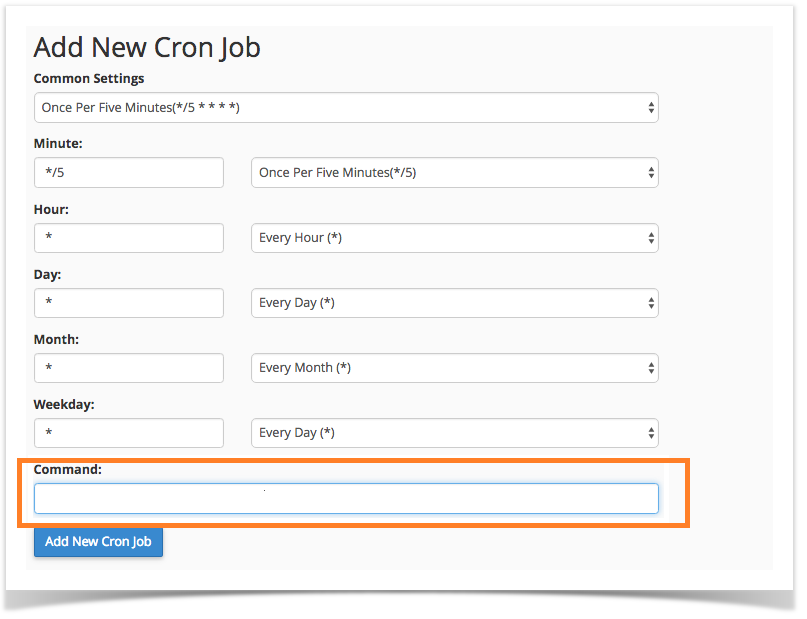
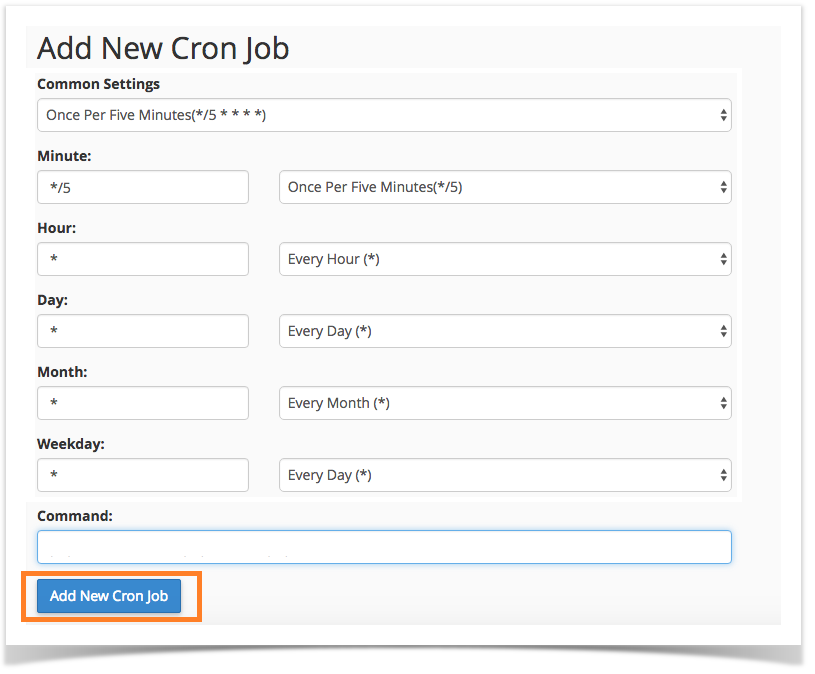
Step 4: Adding the Cron Job
After ensuring the settings are correct, click “Add New Cron Job”. You should now see your job listed in the “Current Cron Jobs” section.
Creating Cron Jobs with Plesk Parallel
Just like cPanel, Plesk Parallel is a popular web hosting control panel. Here’s how to create a cron job using Plesk.
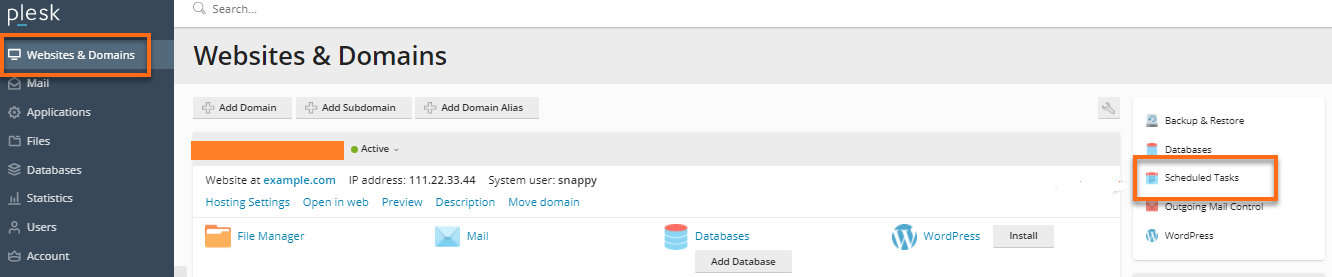
Step 1: Accessing the Scheduled Tasks
Log in to your Plesk dashboard. Click on the “Websites & Domains” tab, and then “Scheduled Tasks”.
Step 2: Adding a New Task
Click on “Add Task”. You’ll see options to select the task type. For a script, choose “Run a PHP script”.
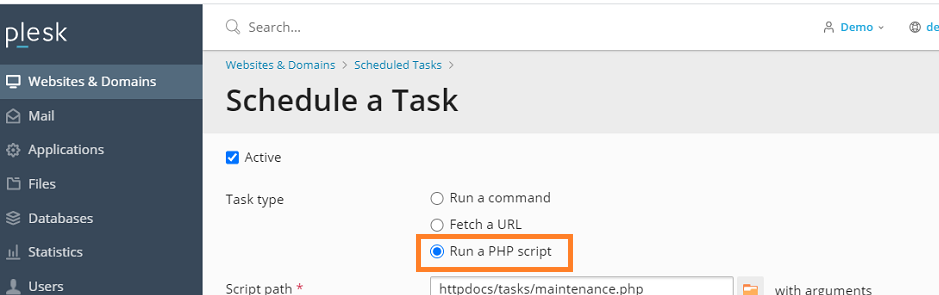
Step 3: Configuring the Task
Fill in the “Script path” field with the path to your script. Below this, in the “Run” section, you can define the schedule for your task.
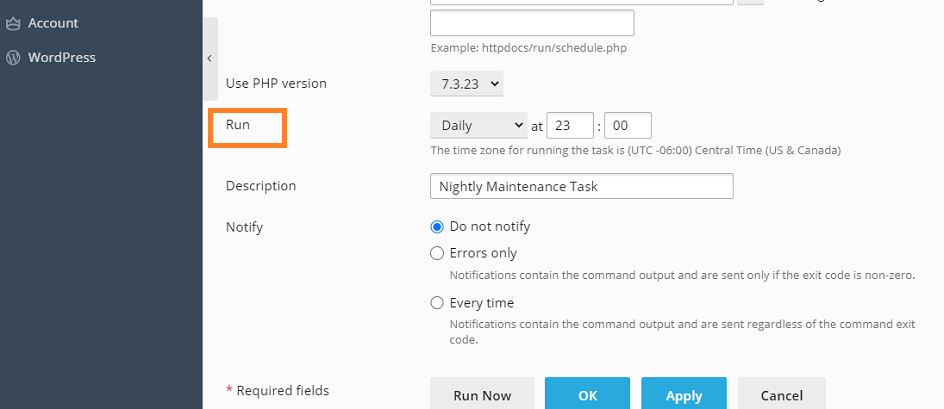
Step 4: Saving the Task
Once you’re satisfied with the settings, click “OK”. Your new task will appear in the list of scheduled tasks.
Key Takeaways
Cron jobs are a powerful tool for automating server tasks, and both cPanel and Plesk Parallel make it easy to set up these jobs. Remember to test your cron jobs after setting them up to ensure they’re working as expected.
By integrating cron jobs into your website or app management, you’ll save time and increase productivity. And with this guide, you’re well-equipped to set up cron jobs in both cPanel and Plesk Parallel. Keep automating!
You can find more helpful articles on our Blog page. Also don’t forget to subscribe to our YouTube channel to get more tutorials related to WordPress. Also, you can join our Facebook page to update yourself with more tips, solutions, offers, and so on.