Do you know WordPress gives you a core feature that allows you to slightly change your website theme?
Well, the default WordPress theme customizer options in your admin panel make this task very simple for you as it provides additional tabs and options to customize your site layout as you need.
In this article, we’re going to show a step-by-step guide to WordPress Customization so that you can tweak your site design using its most advanced features.
How to Use The WordPress Customizer?
Depending on your theme, there are several sets of changes you can make to your site from your admin dashboard.
To access the page, go to Appearance → Customize in your dashboard.
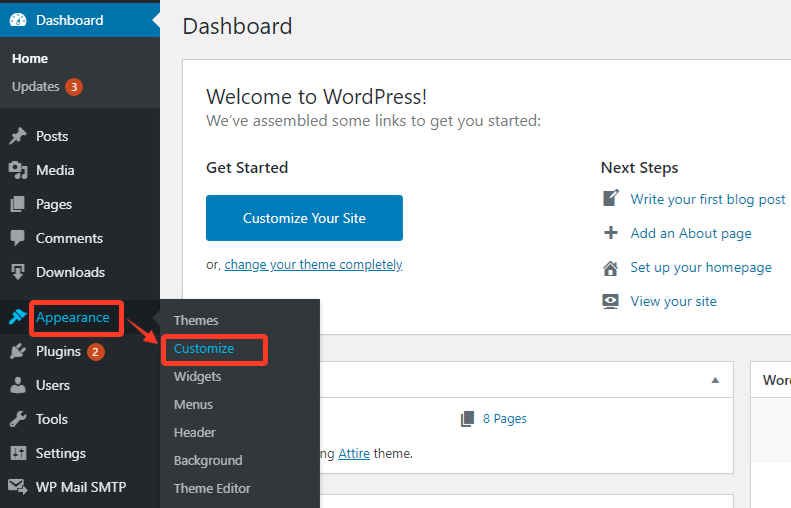
Once you have accessed your WordPress Customizer page you will view an interface that looks something like this:

Although the options are varied depending on the using theme, the layout will always be the same. Here you will see a number of different sections, on the left side. With these options, you can customize your website’s overall look.
Also, on the right side, you will see a live preview of your website.
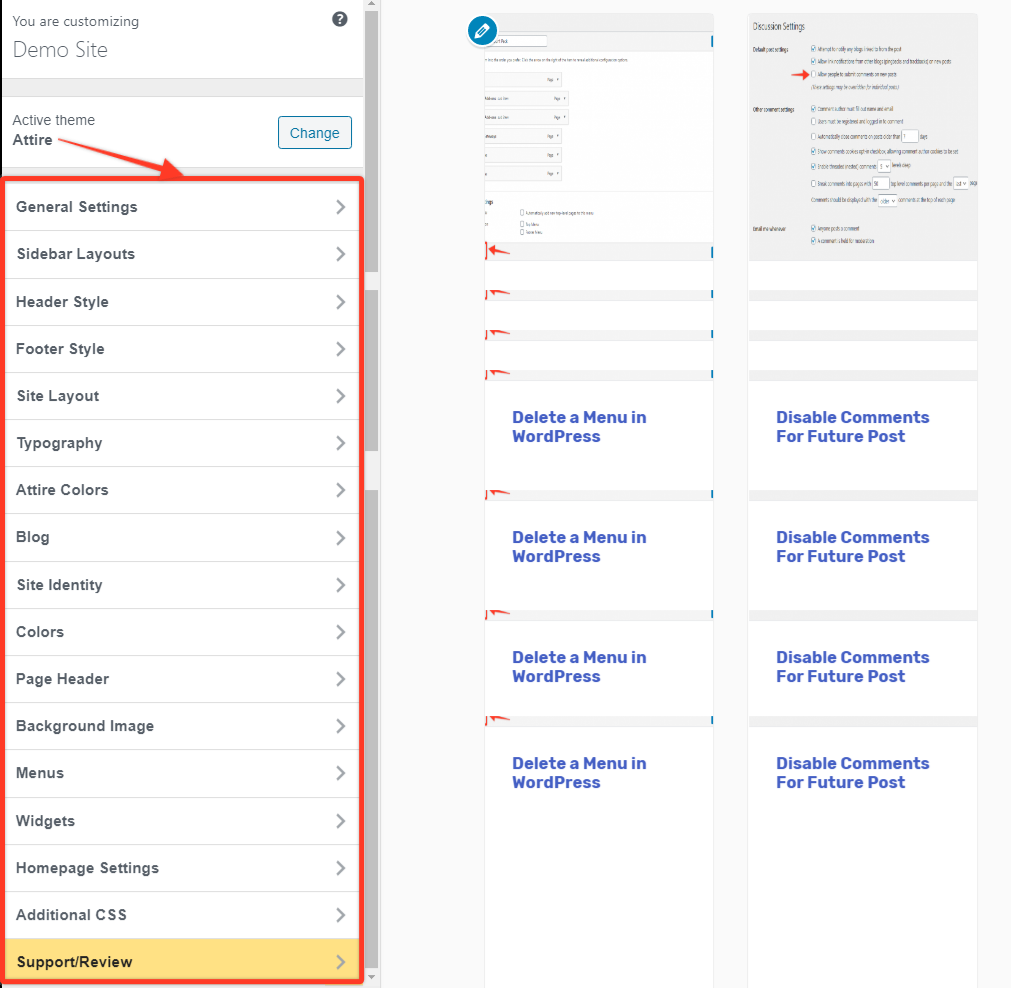
Default Options in the WordPress Customizer
As we mentioned, the options on the Customization Page vary from theme to theme. By default, WordPress provides the following options in the customization,
- Site Identity
- Colors
- Header Media
- Menus
- Widgets
- Homepage Settings
- Additional CSS
Let’s go through the details of the default customization modules that you can use here:
Site Identity
Among all the default options, Site Identity is the first menu option where you can modify your site title and tagline. You can also add your site logo and site icon from the Select logo and upload the logo of your site.
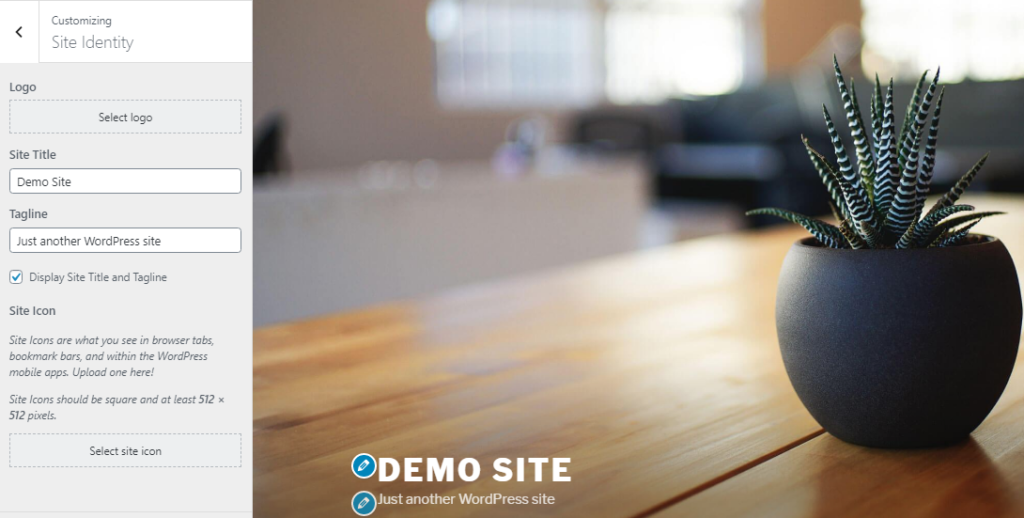
Moreover, there is an option named Site icon that provides you to set up your favicon on the site from the Select image option which views in the browser tabs, bookmark bars, and within the WordPress mobile app when people visit your website.
Colors
The features of the color option depend on what theme you are using on your website. For instance, in the Twenty Seventeen theme, you can set your header text color through the Header Text Color option and select a color scheme as light, dark, or any other custom color for your entire website.

Header Media
In this option, you may upload a video or enter a YouTube URL in the Header Video option that plays in the header section on your website. You may also upload an image file in the Header Image Section which must be matched to the size of your video.
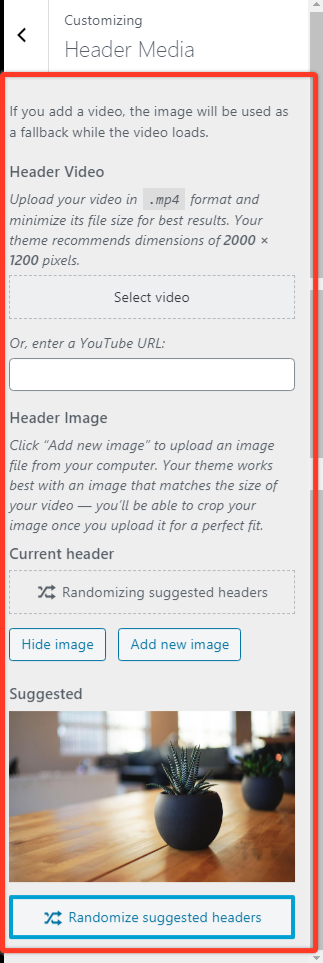
Moreover, you will be able to crop the image to adjust it with the header video. Remember, If you add a video, the image will be used as a fallback while the video loads.
Menus
Menus is another universal option that happens to all themes. From it, you can manage all your existing menus or create a new menu on your site. In the View All Location button, You can check the location of the menu which supports your theme and also selects which menu appears in each menu location.
To create a new menu, you need to click on the Create new menu button. Then, write the name of your menu on the Menu Name box. Also, you can select the location on which your menu will appear on your site. After selecting it, You need to click on the Next Button to start adding links to your new menu.
Once you do that, you may click on Add Items to add your custom links, pages, posts, categories, and tags as menu items.
If you want to reorder your items, you have to click on Reorder and then use the arrow icons to reorder the menu items as you want.
Below it, you will find an option to delete your menu from the Delete Menu button.
Widgets
The Widgets option is quite similar to the menu option. With this panel, you can easily add and manage the widgets on your site. It may also vary depending on what theme you are using for your site.
For instance, on the Twenty Seventeen theme, it allows three widget locations which are the blog sidebar, Footer 1, and Footer 2.
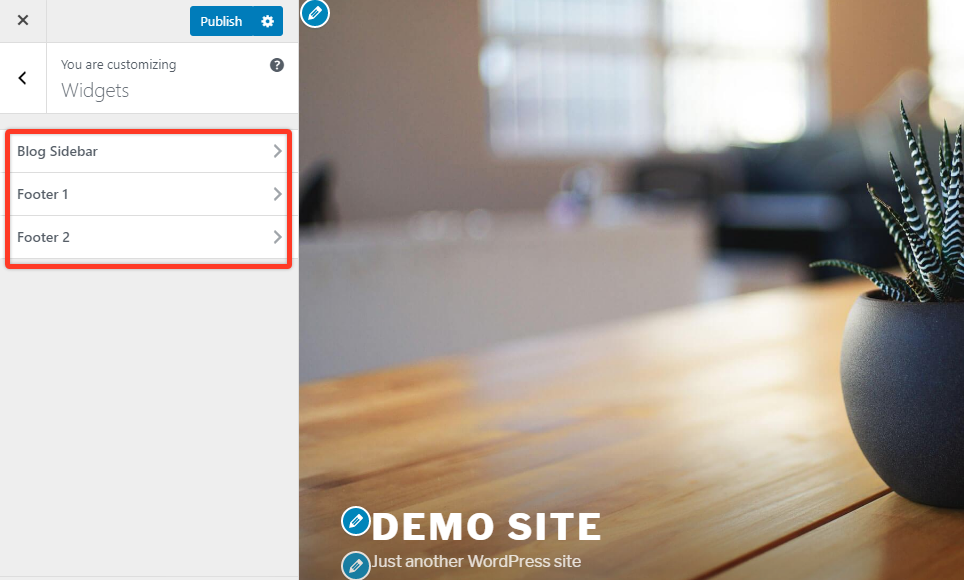
Clicking on any of them will focus on the area on the page where it is placed.
If you want to add a Widget, you will need to click on the add a widget button. Once you click on the tab, it will open a new panel where you’ll see the list of all available widgets.
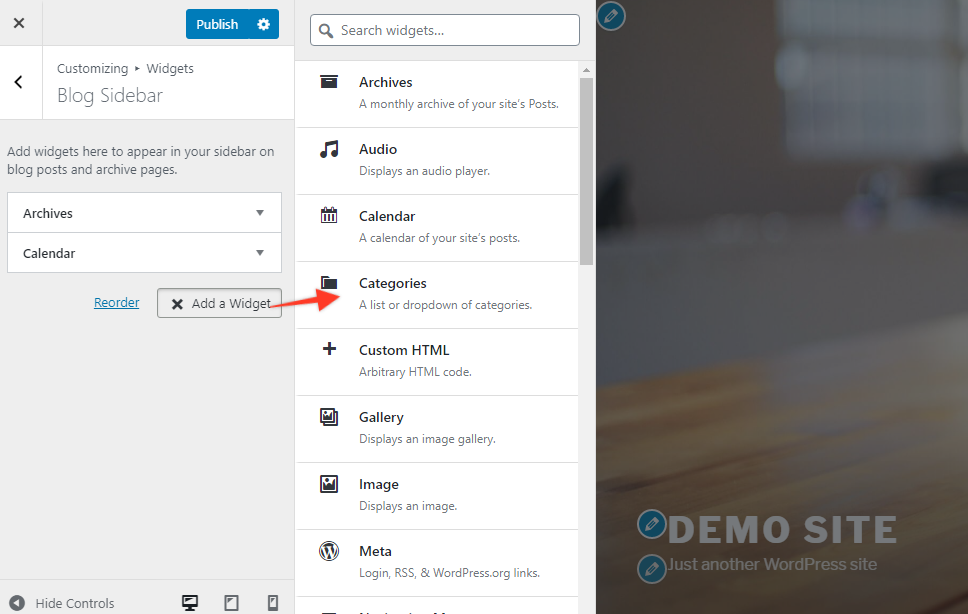
Now, select the one you want to add in the widget area. You may also change the order of your widgets by dragging them up or down from their position.
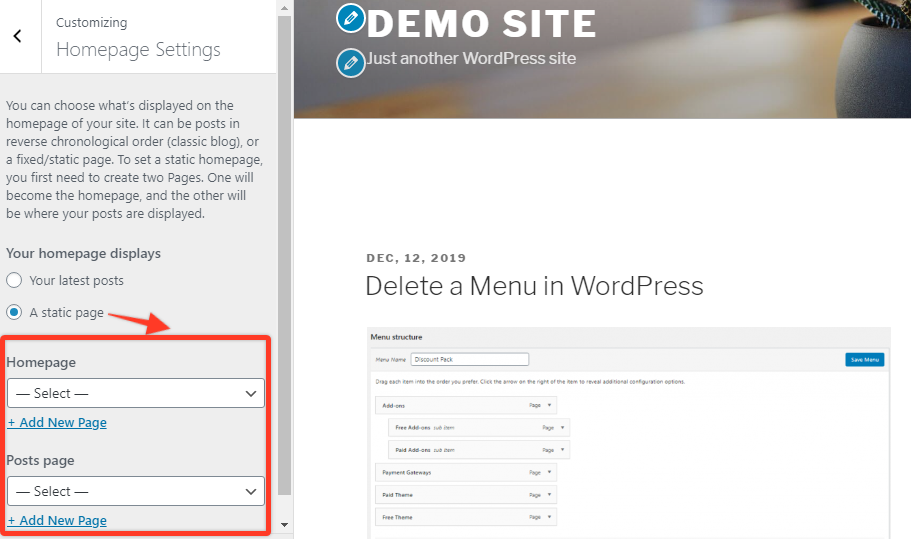
Homepage Settings
With this option, you may select what’s displayed on the homepage of your site. By default, WordPress shows your latest blog posts on your homepage. However, if you want to pick a static page, you can do it with the Homepage Settings option.
To display the static page, first, you will need to check the box for a static page from Your home page displays option. Once you select it, this will open two new drop-down menus from which you can have to select a page for your homepage and another for displaying the posts page.
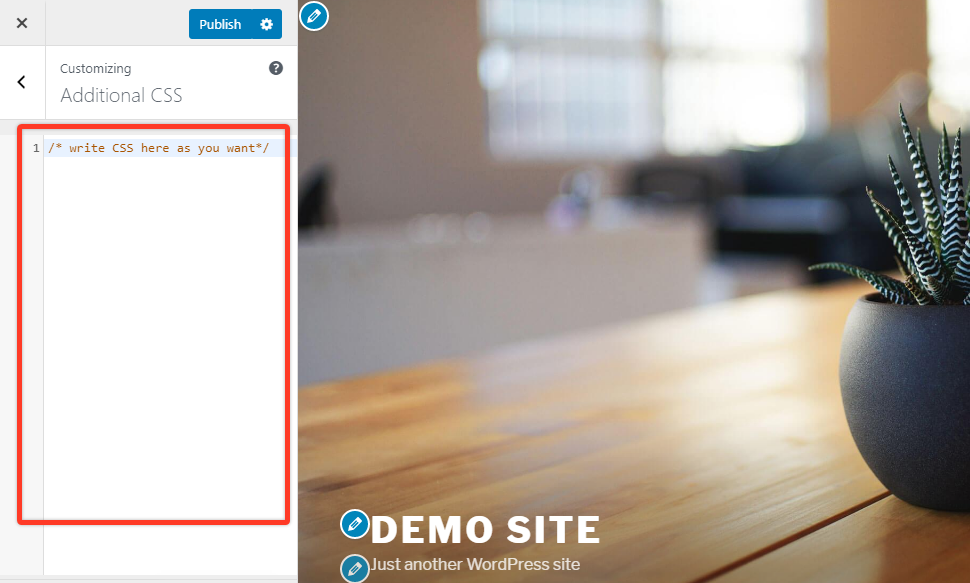
Additional CSS
If you want to add some additional design to your website you can do with the help of the additional CSS button by writing some CSS code. There are some instructions you find when you use a keyboard to navigate.
Best Two Customization Options:
Set on Different Screen Resolutions
On the WordPress theme customizer, the best module is to preview your website on different screen resolutions.
For each website owner, it is a very important module to set up their website as mobile-friendly and great on all screen sizes.
For taking a preview on a different screen, you will get three icons at the end of the Theme Customizer panel. You need to click on the icons to test your site on three different screen resolutions like desktop, tablet, and mobile devices.
Making Changes on Live
Another great option is that you can make changes anything from the preview of the site. To do that, You have to click on any of the blue pencil icons on your live website to open the settings for that selected item.
Finally, for applying those changes you have done through the customization modules, you need to select the action from the action panel.
To apply your changes, you need to click on the Publish button that you will find on the upper left of the panel.
Instead, you can save it as a draft by clicking on the action button. On the action button, you will find three options which are – publish, save draft, and schedule.
If you want to store your changes without making them live, you may click on the Save Draft button.
Instead of it, if you want to publish your changes at a specific time or date, then you have to click on the Schedule button.
The other feature is that you can share the preview link from the Share Preview Link option with anyone to decide whether or not to make the changes live. Even you can share it with the person who can not access the admin area.
Now,
Without the default options, some theme offers more options to customize your themes such as adding a cover template, adding/changing the background image, theme option, changing the layout, editing colors, and much more.
For example, our free theme “ATTIRE” allows a huge number of available customization options which can help you to build an elegant website in a short period of time. These customizations are given below,
Wrapping Up
We always want to take total control over our own site. WordPress gives us the option to take full control of our website through the theme customization feature.
We hope this detailed guide on how to use the WordPress Customizer supports you to take full advantage of it when editing your website. To know more about WordPress’s built-in feature you may check our WordPress-related content.
If this article will help you, please subscribe to our YouTube channel to get more tutorials related to WordPress. Also, you can join our Facebook page to update yourself with more tips, solutions, offers, and so on.
We appreciate further comments, support, or suggestions!