Do you want to allow someone with less authority in your WordPress website to perform some specific tasks? WordPress gives you the option to include this amazing feature on your website. Besides the predefined user roles, you can create a custom user role for certain tasks and allow him to access your dashboard with limited leadership.
Well, in this article, we will cover how you can create custom user roles in your website and how to assign them to its users.
so, let’s begin!
Methods To Create A Custom User Role In WordPress
A User Role is a built-in feature of WordPress that helps to set which tasks a user may or may not perform on your website. There are six defined user roles in WordPress. You can read our article “What are WordPress User Roles” to know details about WordPress User Roles and the responsibilities of each user role.
Now, there are two ways you can apply to create a custom user role. One is by adding code manually and the other one is with a plugin. It fully depends on you which one you choose to apply.
But we will recommend you if you aren’t familiar with coding you can create with the help of a plugin.
Below, we describe the two ways of creating the custom user role as
- Manually by writing code
- Using a plugin
Method 1: Create Customer Role Manually
Besides the predefined WordPress User role, you can create WordPress custom user roles with a sort of coding.
In WordPress, a function called add_role() is used to create a custom user role. It has three parameters and each parameter serves a different function.
add_role( $role, $display_name, $capabilities );
Here,
- $role (string) (required): Unique name of the user role
- $display_name (string) (required): The name to be displayed on your website
- $capabilities (array) (optional): Capabilities and responsibilities that one can access.
Now, To create the custom role according to your requirement, you have to follow the given steps,
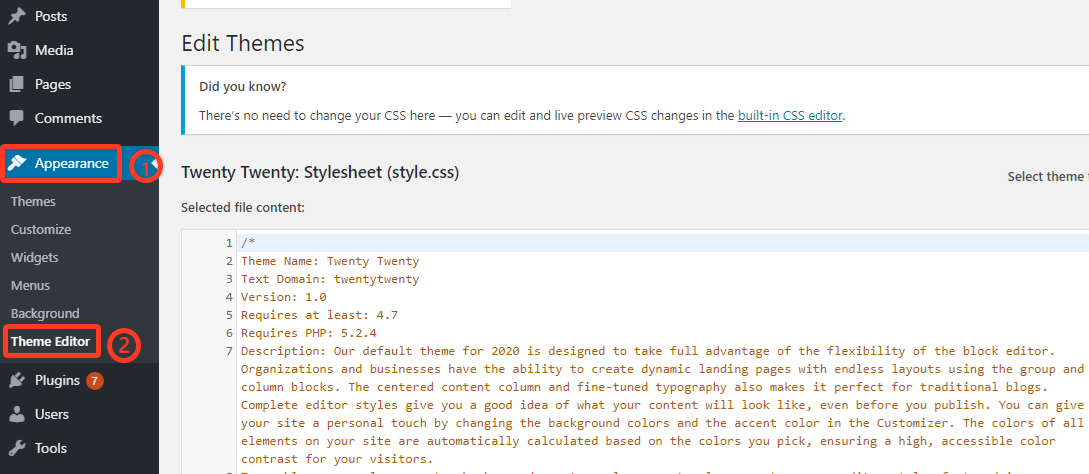
- First, log in with your admin dashboard. Next, go to the Appearance ► Theme Editor option.
- Here, if you use this option the first time you will get a message like this,
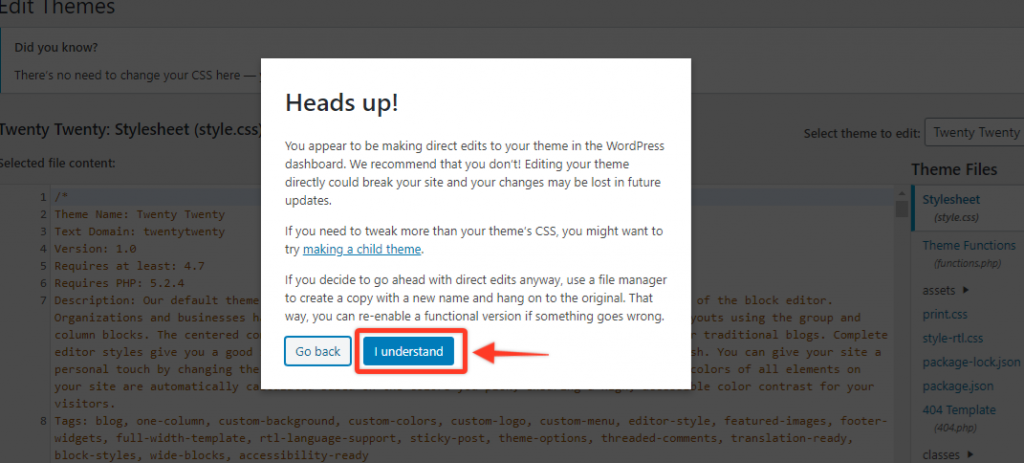
It’s actually a warning message as it can break your theme design if you made some mistakes. Now, click on the “I understand” option.
- After clicking the option, we will see the design codes of your running theme. On the right side of it, under the Theme Files, click on the Theme Function as the function.php file.
- Here, scroll down to the bottom of the page. In the end, you have to add the following code,
add the new user role
    add_role(
        'content_writer',
        'Content Writer',
        array(
            'read'         => true,
            'edit_posts'  => true,
            'delete_posts' => false
        )
    );

}
add_action('admin_init', 'ui_new_role');
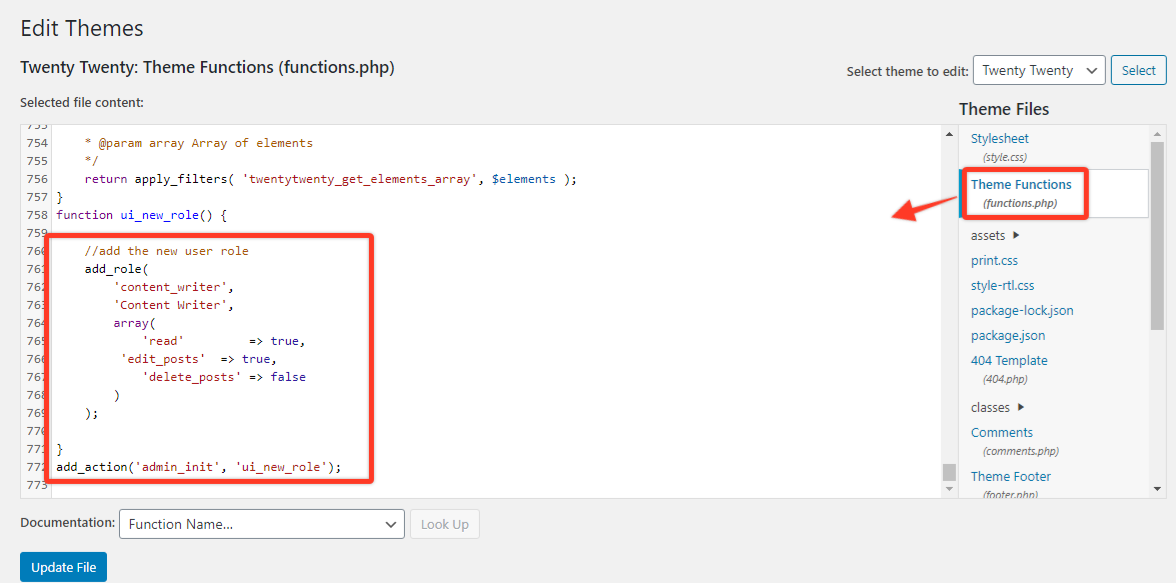
After putting the file, now click on the Update File option to save the current changes. That’s it. Your coding part is done.
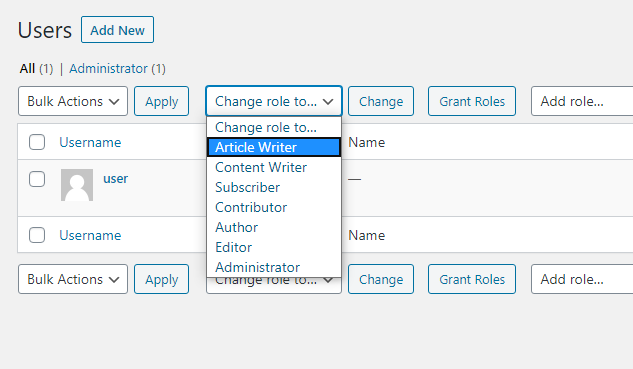
- Now if you want to view the new custom role ” Content Writer” in your dashboard, Just go to User ► All Users. Here, you will see the new role is listed along with other default user roles.
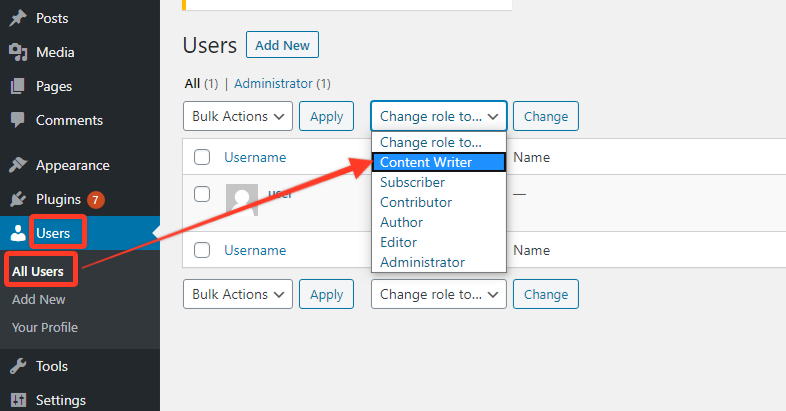
That’s all, Now, from the WordPress admin panel you can appoint a new user to this custom user role.
Method 2. Create a Custom Role With a Plugin
If the existing WordPress user roles don’t fit your needs, you can either add additional responsibilities or just create custom user roles using a plugin. There are lots of plugins you can choose but here we will recommend using the User Role Editor plugin. The plugin will allow us to assign specific roles to users, also you can edit all existing user role capabilities with a few clicks.
Let’s learn how to use this plugin:
- In the first step, you have to search for the plugin from your plugin library and install it like the other plugin. After installing then activate the plugin.
- Next, go to your dashboard again and go to the User ► User Role Editor.
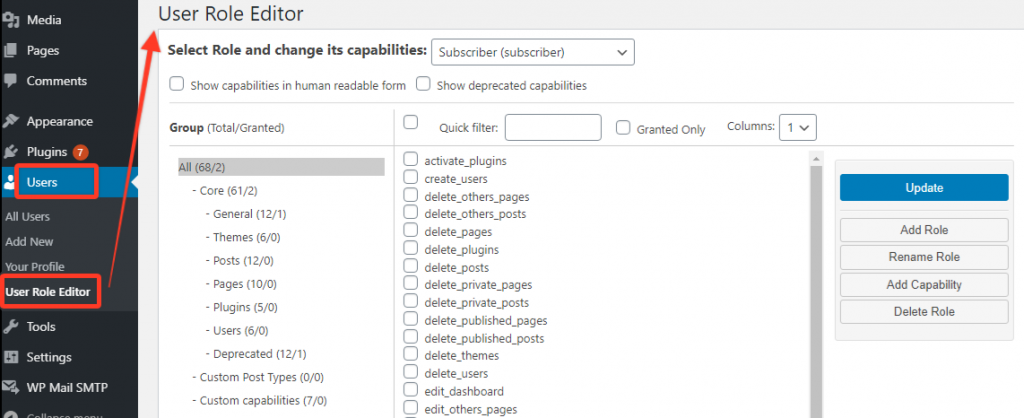
- Here, you will see a list of roles and capabilities. Now to create a new custom role, click on the Add Role button.
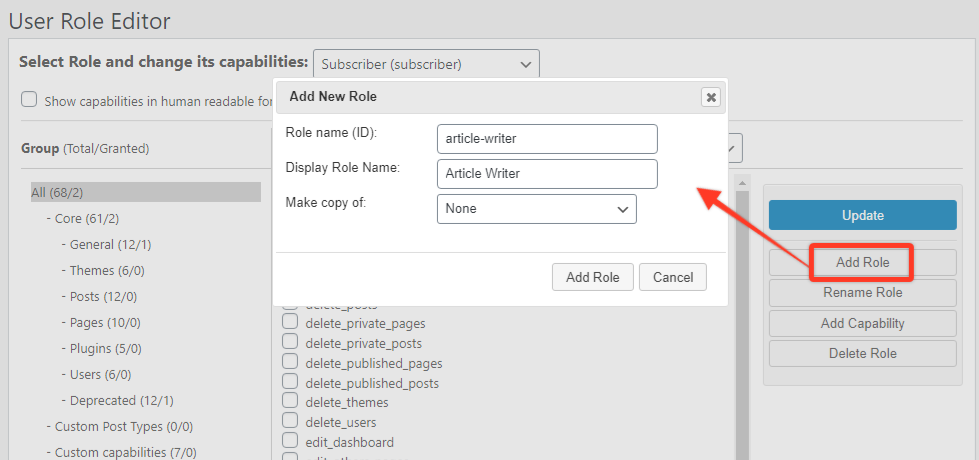
- After opening the Add Role tab, put the new role name in the Role Name box. Next, put the display name in the Display Role Name which will appear on the dashboard. Then, the last field box Make a copy of is the optional box. With it, you can copy the existing capabilities of an existing role for this new user role.
- Now, After adding the role, it’s time to add the responsibilities of this new role. To do that, you can check or uncheck the box from the list of capabilities to assign permission and capability to a role. After selecting, make sure you will click on the Update button to save the capabilities of the role.
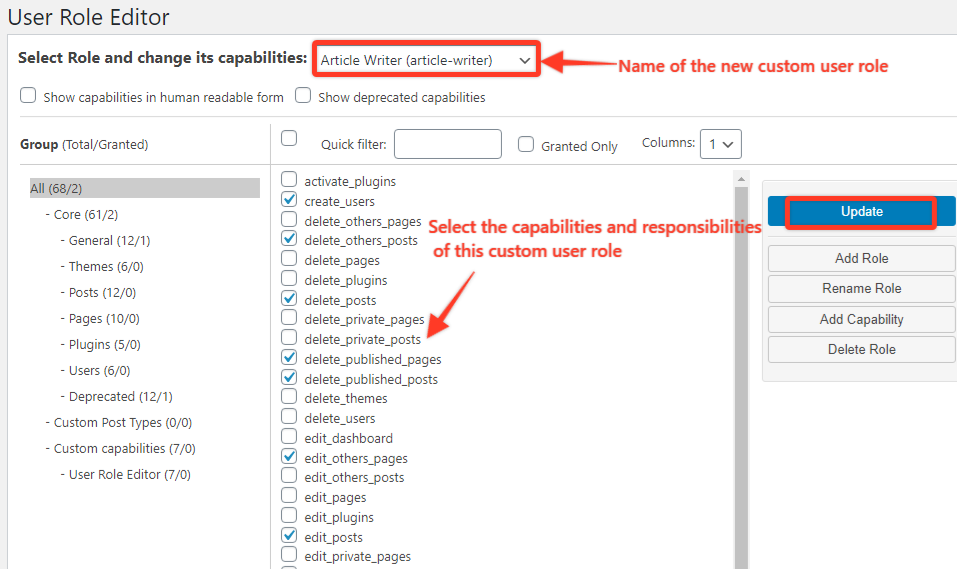
- Finally, to check the new role, go back to the All user from the User tab and view the new user role.
Conclusion
If multiple people are working on your WordPress website, creating custom user roles for them can come in handy in that scenario. Moreover, it helps you to define specific user access. In addition, with it, you can also differentiate users by creating user levels. So you should learn the approach of creating a custom user role for your website.
Hopefully, this article will help you to understand the methods of creating a custom user role in WordPress. For more about WordPress, you may check our WordPress Tips and How-To’s to know more about WordPress.
If this article will help you, then please subscribe to our YouTube channel to get more tutorials related to WordPress. You may join our Facebook page to update yourself with more tips, solutions, offers and so on.
You may also ask any questions in the comment or want us to write on some specific topics you have in your mind. We appreciate your further comments, support or suggestions!