In any WordPress blog post, article, or content, Image takes the main power to attract your visitors. It helps to drive more traffic to your content. So it’s vital to know basic image editing in WordPress.
Luckily WordPress itself gives you the power to do basic editing like crop, rotate, scale, and flip an image with the built-in editor.
Do you know how to do basic image editing in WordPress with the default tools?
Well, in this article, we will describe the feature of WordPress of how you can use it as a basic image editor allowing you to create, rotate, scale, and flip images.
So. let’s begin!
Basic Image Editing In WordPress Using Built-In Editor
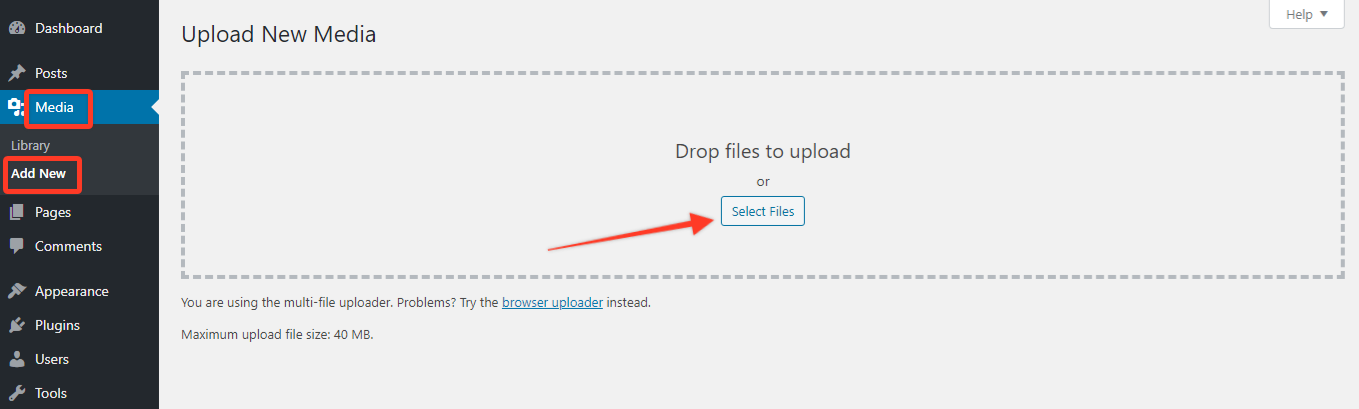
To edit your image with WordPress, the first thing you have to do is upload the image on your admin dashboard. For doing this, you need to go to your admin area and then go to Media ► Add new option. Now select the image from the media library or your computer.
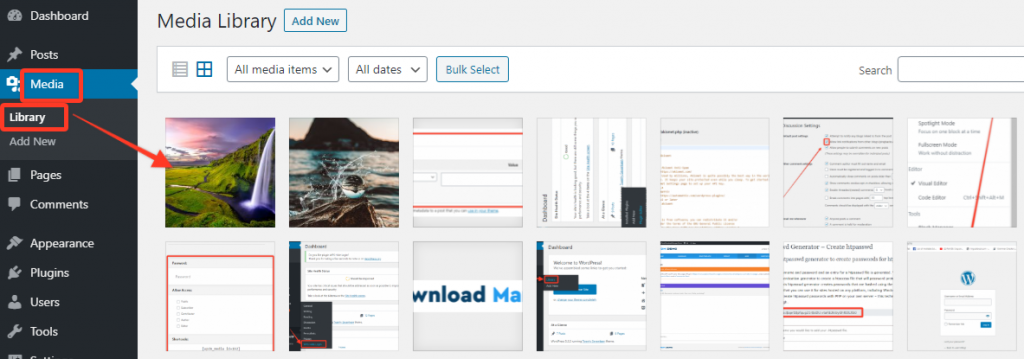
Once you have uploaded the image, it’s time to go to Media► Library and select the image that you have just uploaded.
After clicking on it, it will open with a new popup window where you will see lots of information about the image details on the right column.
On the left column, you will have a preview of the image and an option to edit the image.
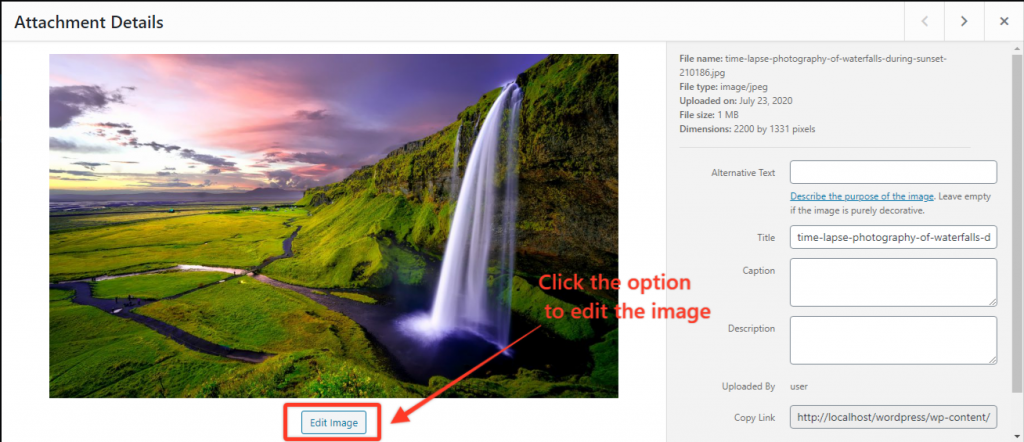
Now, click on the Edit option to do the basic edit of your image. Once you have clicked on it, it will open a new window with a bunch of options to edit, crop, resize or flip it as horizontal and vertical.
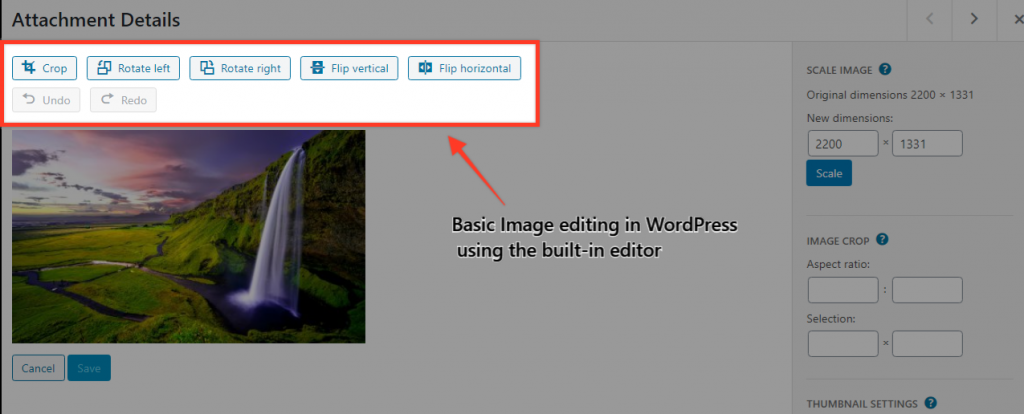
Let’s know what each of these options does.
- Crop – This option gives you the feature to cut down the unnecessary area from the image. When you click on this option, you will notice that a rectangular portion appears on your image. You just have to set the size of the image area which you want to take.
- Rotate – There are two options to rotate left and right. These two options allow you to rotate your image clockwise or anticlockwise.
- Flip – Like the rotate button, the flip button also appears as two options. With these, you can flip your image horizontally or vertically.
- Undo/Redo – If you want to back your original image or change your recent editing, then you can use this button to revert your image.
Now. Let’s know the options of the right column of the default editor,
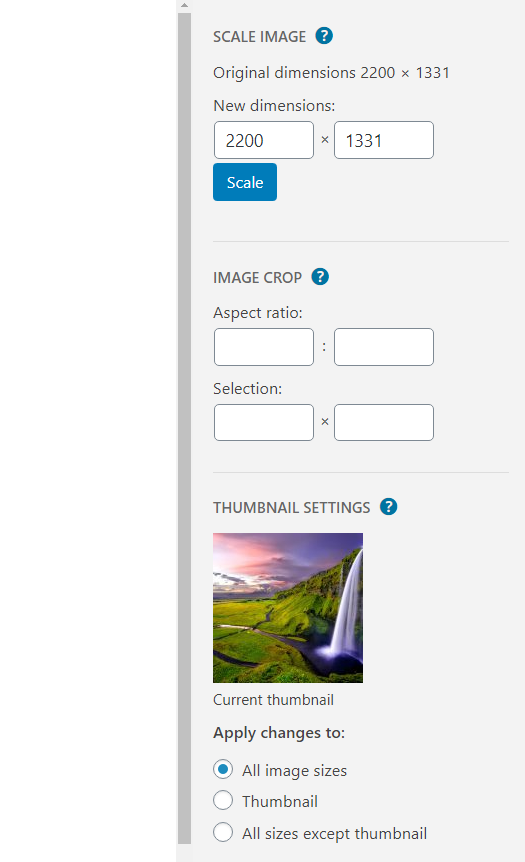
- Scale Image – The scale image provides the option to set the image size manually. You have to use this option before using any kind of editing option( crop, rotate, flip) otherwise you can’t maintain the image proportions.
- Image crop – In this section, we will see two options, Crop Aspect Ratio and Crop Selection. When you want to hold a specific aspect ratio, then you have to use the aspect ratio option. After setting the aspect ratio, now you can use the crop option and can crop out the selection you choose with the predefined ratio.
The crop selection allows you to specify the size in pixels that you want to crop. It means when you want to crop a specific size, you need to set the size on the selection box and then select the crop option. Once you click the crop button above your image, it will automatically crop the selection.
- Thumbnail Settings – Lastly, the Thumbnail Settings option allows you to choose whether you apply the changes to all image sizes or just the thumbnail, or even all image sizes except the thumbnail.
After doing all editing, make sure you have saved the editing by the save button under the preview of the image.
Restore Original Image
That’s not ending. WordPress itself gives you the option to restore your original image even after saving the edited image.
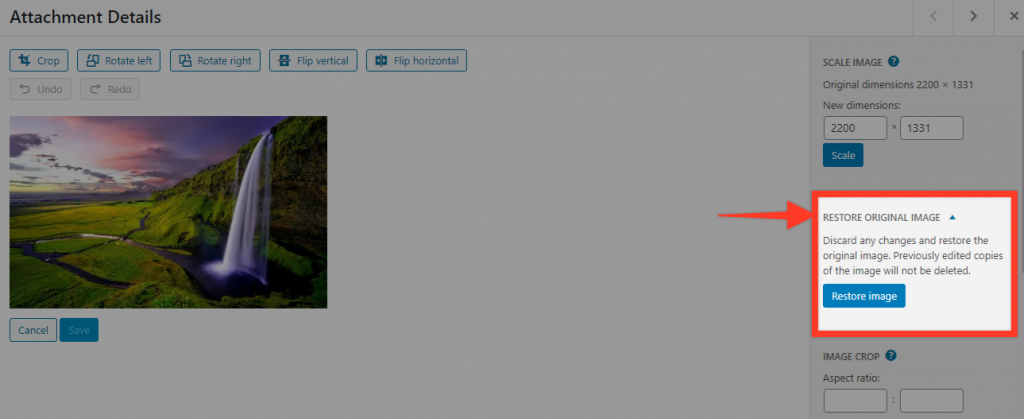
To get it, simply go to the image again and choose the Edit Image option. Now, this time you will notice a new box appear in the right column labeled Restore Original Image. If you want to revert your original image, then simply click on it.
Conclusion
To wrap up, having a flawless image will visually appeal to your content. The WordPress built-in image editor makes this work easier and simpler without losing the image quality.
Hopefully, this tutorial will help you to understand how to do basic image editing in WordPress with the built-in editor. To learn more about WordPress features and its tips & tricks, you may check our WordPress Tips and How-To section.
If this article will help you, then please subscribe to our YouTube channel to get more tutorials related to WordPress. You may join our Facebook page to update yourself with more tips, solutions, offers and so on.
You may also ask any questions related to it in the comment or want us to write on some specific topics you have in your mind. We appreciate your further comments, support or suggestions!