The first thing you need to do for running a website successfully is to concentrate on your site security. Your site security is as important as the content and SEO of your website. Thousands of websites get hacked due to the lack of security. So all your effort on content and SEO is worth nothing if you are not paying attention to the security of your site.
You can improve your WordPress site security in a lot of ways. But the HTTP security header is relatively simple and more effective. They add another layer of security by helping alleviate attacks and vulnerabilities. Today we are going to discuss everything about HTTP security Headers and explain how you can implement them in your WordPress website.
What are HTTP Security Headers on WordPress?
HTTP security headers tell web browsers what they can and cannot do with your website. Basically, when a user visits your website through a web browser these headers inform the web browser how to act throughout the interaction. They improve the resilience of your web application against many common attacks, including cross-site scripting (XSS) and clickjacking. Ultimately it protects both you and your site’s user in case the web app is injected with malicious code on the pages.
For example, by adding strict-transport-security, you can force all the latest web browsers like Google Chrome, Firefox, and Safari to communicate with your website over HTTPS only.
Types of HTTP Security Headers:
Now, it’s time to know about the types of HTTP security headers. There are many types of security headers but we recommend the following security headers for your WordPress site:
1. HTTP Strict Transport Security (HSTS):
HTTP Strict Transport Security (HSTS) tells web browsers that they should only use a secure HTTPS connection to interact with you. It works by directing the browsers to communicate over HTTPS instead of HTTP. Basically, it ensures that all the data have to exchange only using HTTPS protocol and not using HTTP. HSTS header is supported on all the major latest versions of a browser like Chrome, Firefox, Opera, Safari, IE ETC. But before implementing the HSTS header you need to ensure that all your website pages are accessible over HTTPS. Otherwise, those pages can be blocked.
2. X-XSS Protection:
XSS stands for Cross-site scripting. Now if you don’t know about cross-site scripting attacks, in this attack hackers inject malicious code into your web application. So, the X-XSS Protection header protects your websites against cross-site scripting. Implementing this header wouldn’t let a page load if it detects a cross-site scripting attack. Certain browsers like Chrome, IE, and Safari have built-in X-XSS protection. Google, Facebook, and Github use this header, and most penetration testing consultancies will ask you to implement this.
3. X-Frame-Options:
Clickjacking is an online attack that tricks users into clicking something other than what they intended without realizing it. If you want to prevent your site from a clickjacking attack, you need to add the X-frame-options header. As hackers use iframes to perform a hidden action. This header protects sites against clickjacking by not enabling iframes to fill on your website. IE 8+, Chrome 4.1+, Firefox 3.6.9+, Opera 10.5+ and Safari 4+ support this security header.
4. X-Content-Type-Options:
The X-Content-Type-Option header prevents the browser from loading the content if they detect any mismatch on the MIME type. This header stops the browser from interpreting files as anything other than what’s been declared as the content type. For example, if an attacker uploads a Javascript file that is actually not a Javascript file, this header will stop the browser from loading it. Most browsers support the X-Content-Type-Options header.
5. Referrer-Policy:
The referrer headers contain the information where the visitor is originating from. But visitors can be tracked without their knowledge and this can be misused by the attackers to track the users. So you may want to restrict the information from showing upon web analytics software logs. The referrer-policy header controls the information sent through the referrer header with URI requests. This is one of the recommended WordPress Security headers that can come in handy.
6. Content-Security-Policy:
Content security policy is the most powerful security header among all the security headers out there. The content security policy header allows you to decide which resources a user is allowed to load within the site. This header basically tells your browser which dynamic resources are permitted to load. No matter what code is in that webpage, the browser will only allow loading what you specified within your content security policy header.
7. Permissions Policy:
The Permission Policy header is a security header that controls which browser features can be used. It controls the browser’s features such as fullscreen, speaker, USB, autoplay, speaker, vibrate, microphone, etc. to enable or disable within a web application.
Setting up HTTP security headers on WordPress:
As you already know about HTTP headers, now you might be thinking about how you can implement them on your WordPress site. Security headers are very easy to add or implement and do not need a lot of technical skills. Let’s show you some easy short ways to do so.
1. Add HTTP security headers on WordPress Using .htaccess:
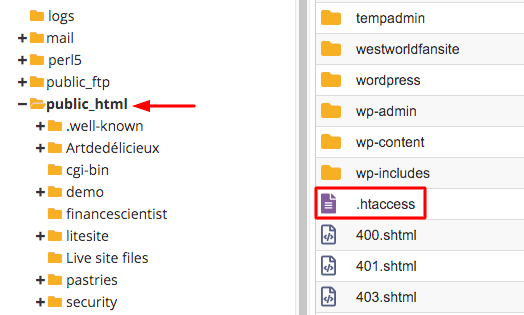
WordPress wants to protect the .htaccess file from any potential danger. That’s the reason the .httaccess file can be hidden. To find the .htaccess file, you’ll need to log into your WordPress hosting account and navigate to the cPanel. From there, launch the File Manager and select the public_html folder.
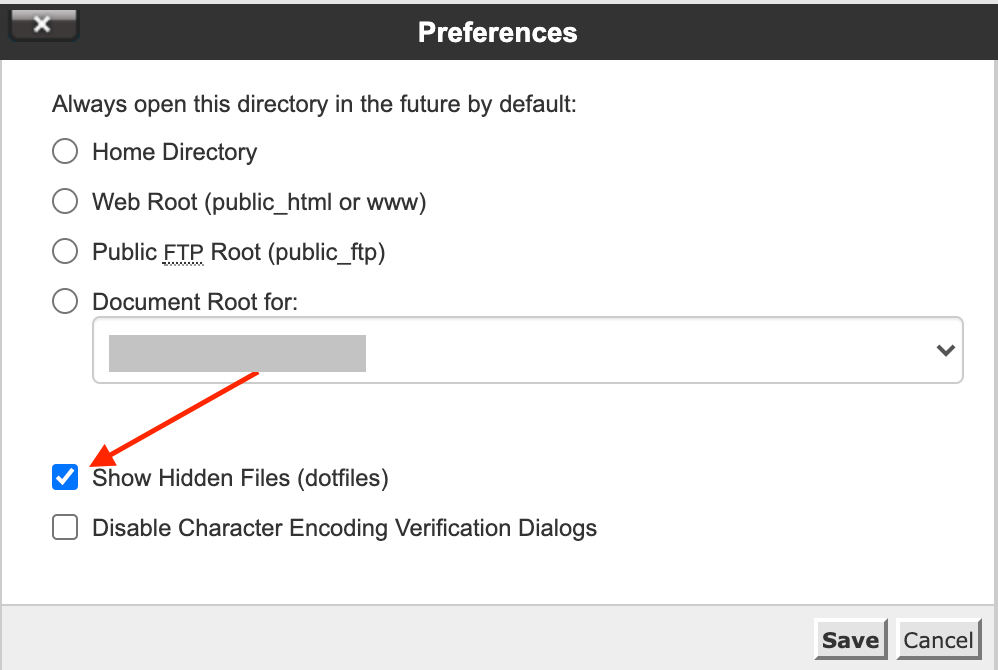
Go to settings, you will see a window pop out. Then click on the option ‘show hidden files’ there.
From the File Manager, go to the public_html folder. the .htaccess file is located in this folder.
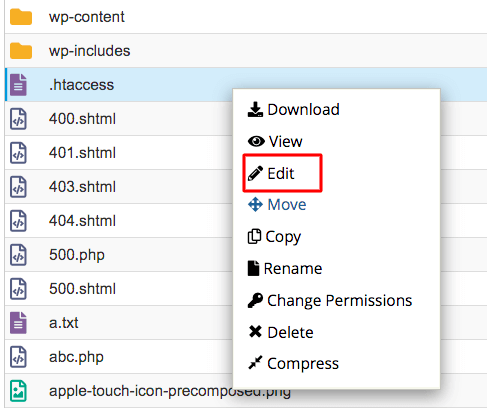
Then, right-click on the .htaccess file and select ‘Edit’.
Now add the following code at the end:
<IfModule mod_headers.c>
Header set Strict-Transport-Security "max-age=31536000" env=HTTPS
Header set X-XSS-Protection "1; mode=block"
Header set X-Content-Type-Options nosniff
Header set X-Frame-Options DENY
Header set Referrer-Policy: no-referrer-when-downgrade
</IfModule>
Finally, save the change and check if your site is working properly or not.
2. Add HTTP security headers on WordPress Using Cloudflare:
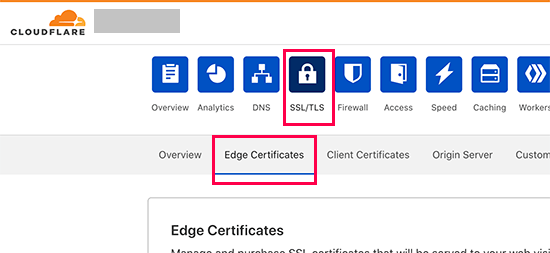
If you have already added your site to Cloudflare you can choose this method to add HTTP security headers on your WordPress site. For adding HTTP security headers go to the ‘SSL/TLS’ page and click on the ‘Edge Certificates’ tab.
After that, scroll down to check the ‘HTTP Script Transport Security (HSTS)’ and click the ‘Enable HSTS’ button on the right side.

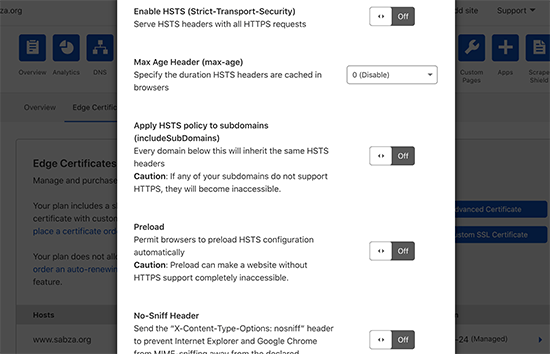
Consequently, a popup will appear with the instructions. Click on the ‘Next’ button and you see the HTTP security header adding options. You can see in the below picture three options are available there. Turn On the ‘Enable HSTS’, ‘Apply HSTS to subdomains’, ‘Preload HSTS’, and ‘No-Sniff Header’.
That’s it! You have added HTTP security headers on your site. You can also add HTTP security headers using the workers feature but that can be a little bit tricky for you if you are a beginner.
3. Add HTTP security headers on WordPress Using Plugin:
Plugins are the most attractive thing about WordPress. You can add any functionality using them. The same goes when you want to set up HTTP headers on your site. So, today we will show you how you can set up HTTP security headers with two different plugins.
1. With Sucuri Plugin:
We assume you already installed the Sucuri plugin. If so firstly, go to ‘Sucuri Security >> Dashboard’ from your admin dashboard menu bar. Here you will see a different menu, click on the ‘Settings’ and then the ‘Security’ option.
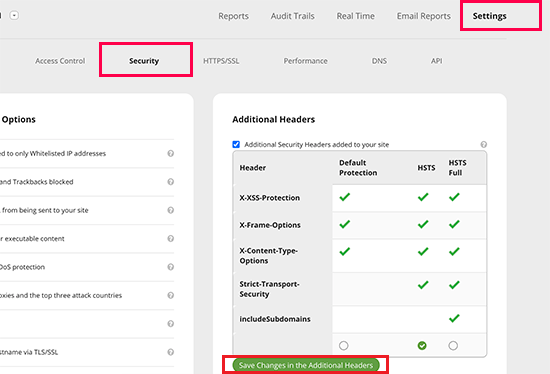
Here, you will see three different sets of rules to set-up headers. These are Default Protection, HSTS, and HSTS Full. So, click the one you prefer. Then press the ‘Save Changes in the Additional Headers’ to save the chosen header set.
2. With Redirection Plugin
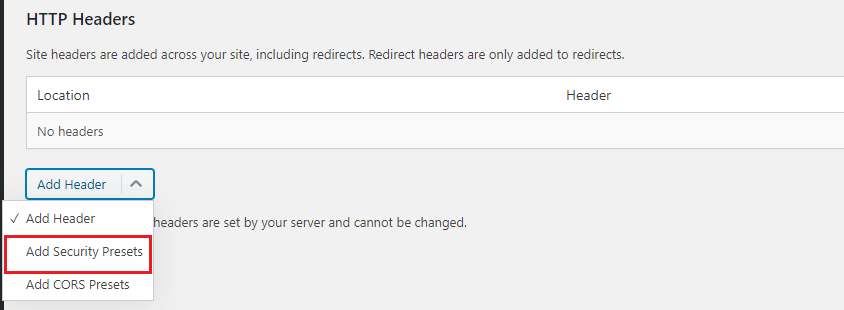
As you install the Redirection plugin, go to ‘ Tools >> Redirection’. On the ‘Redirection’ page you will see different tabs, press the ‘Site’ tab.
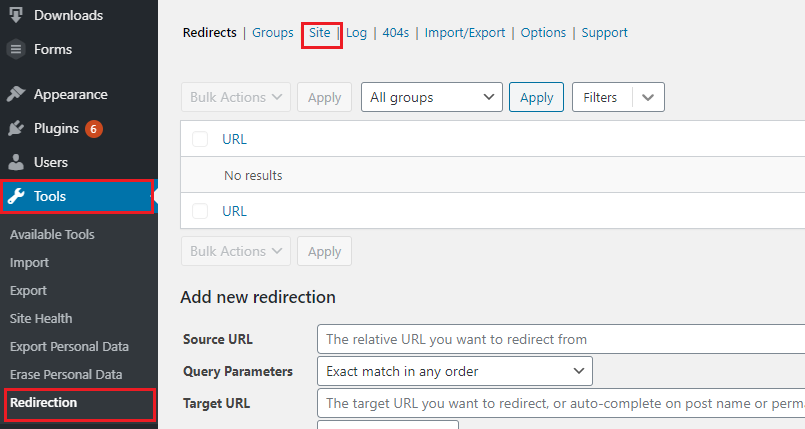
After that, scroll down to go to the ‘HTTP Headers’ section. On the ‘HTTP Header’ section, you will get an option called ‘Add Header’. Select the ‘Add Security Presets’ option.
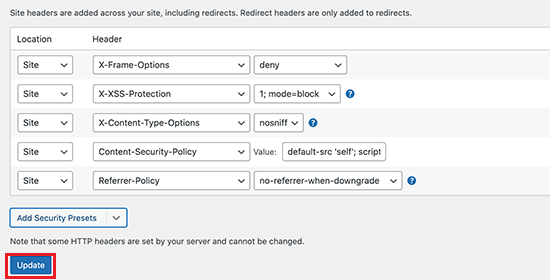
Now, you will see a preset list of HTTP security headers appear. You can change them as per your preference and click the ‘Update’ button to save the changes.
If you have followed any of these two processes you might have added HTTP security headers on your site successfully by this time.
Site Security Report Checking with Cloudflare:
Now it’s time to test if the security headers you added are working properly. You can test that with the free security header testing tool. Go to securityheaders.com, enter your site URL, and click on the scan button.
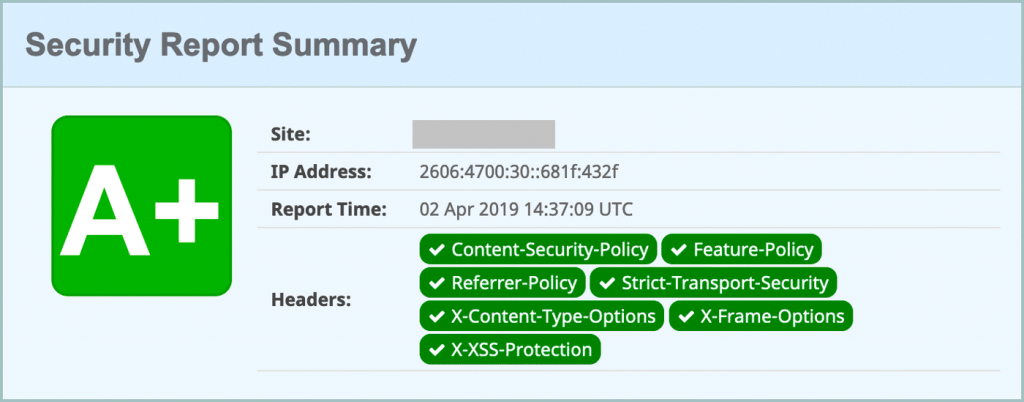
You will get your site security report. They will show your site security results by grading them A+/A/B…/F. Also, they show you which type of HTTP security headers are working on your site.
So, set up the HTTP security header and add an extra security layer for your visitors. Hope this article helped you to get a clear idea about HTTP security headers. Check our Blog section to get more informative articles like this.
Are you a WordPress expert? If you are looking for a job as a WordPress developer, visit Jooble.