If your site is slow, there are tools like Google PageSpeed Insights or GTmetrix to check what is the issue. These tools can tell you precisely what you want to know about your website’s performance and what you need to change. However, sometimes it might show you a “Leverage Browser Caching” warning, which may be confusing for you. But with a few tweaks, you can implement this development best practice on your site to cut down loading times and improve your PageSpeed score. In this article, we will have a detailed discussion on leveraging browser caching warnings and how to fix leveraging browser caching warnings in WordPress.
What is Leverage Browser Caching?
When a web page loads, all its resources such as images, CSS files, HTML code, and JavaScript files load separately. Many requests traveling from the browser to the server can increase the server load and increase your page’s loading time.
Caching represents the amount of time that browsers locally store the cacheable resources available on a website. The whole idea behind caching is to “save” an up-to-date version of your website for visitors to access it more quickly.
Caching allows browsers to load common files like stylesheets, logos, images, etc faster when the user visits your site. The method to take advantage of the Browser Caching technique to improve your site loading speed is called Leverage Browser Caching. And this is the reason why people want to leverage browser caching in WordPress.
Where Can You Check the Leverage Browser Caching Warning?
When you see a leverage browser caching warning that means there is a lack of proper HTTP cache headers in the webserver. Also, there is a chance that the headers may be there, but the caching time specified in your settings may be too short. An easier way to determine if you need browser caching is using a page speed test tool such as PageSpeed Insights, or GTmetrix. You can see in the following image, we are using the GTMetrix speed testing tool to determine if we need browser caching.
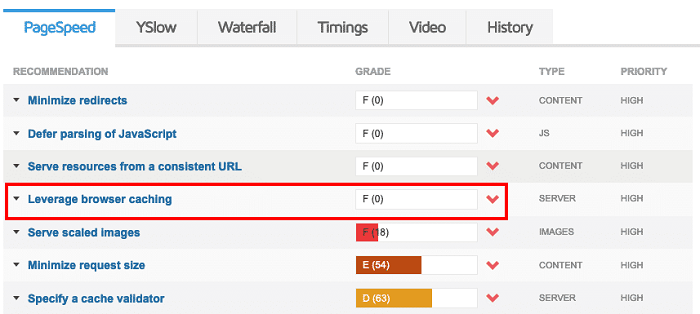
To start a detailed test simply enter the URL of your website, the test results will show you how you can speed up your website. If you see the “Leverage browser caching” message, click the “Show how to fix link” to see which files are referenced. You can enable browser caching easily by adding a simple piece of code in the .htaccess file. Also, you can do the same using several free WordPress caching plugins. Furthermore, in the following sections of this article, I’ll discuss how you can Enable Leverage Browser Caching in WordPress with or without plugins.
Fix Leverage Browser Caching Warning:
There are a couple of methods to leverage browser caching in WordPress. The best way to fix it will depend on your unique website and host, but we’ll walk through two different methods to help you leverage browser caching. Here, those two different solutions will most likely resolve it.
- Fix Leverage Browser Caching Error Using Plugin
- Fix Leverage Browser Caching Error with Code
Method 1: Fix Leverage Browser Caching Warning Using Plugin
Usually, we recommend using the code in the .htaccess file rather than using a WP Plugin. But if you are a newbie tweaking and playing around with the .htaccess file can break your site. So, we are starting with plugins because they’re the easiest way to leverage browser caching for both newbies and experts.
Luckily, there are lots of quality WordPress caching plugins that have browser caching features. You can check the Top 7 Best WordPress Caching Plugins For Better Performance to choose your preferred one. However, we’ll go over three of them so that you can utilize leverage browser caching for your WordPress site:
W3 Total Cache:
If you’re looking for a good way to leverage browsing caching in WordPress using a plugin, we would highly recommend W3 Total Cache. It is a huge name in the caching plugin industry, and it gets incredible results. Though W3 Total Cache requires more manual settings than other plugins. But it gives you more control over your website’s cache. Other plugins strive to improve or correct specific problems for the average website, and this plugin goes far beyond that.
- First of all, download, and install the plugin
- Go to General Settings of the plugin
- Scroll down and Enable the “Browser Cache” and “Save” all settings
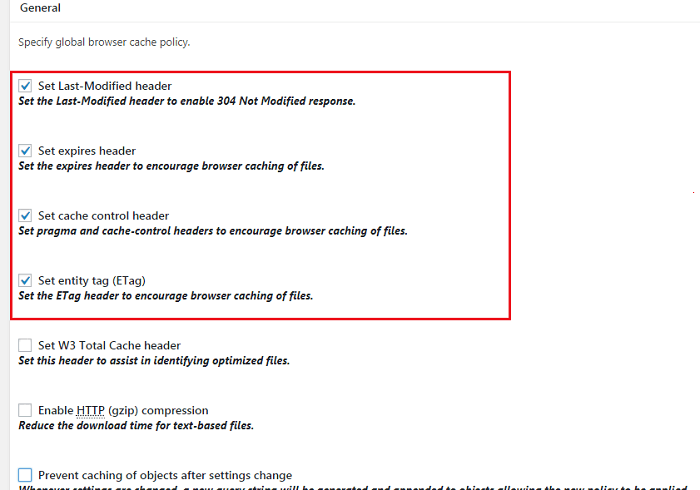
- Further, navigate to the Browser Cache Settings Tab available at the top of the page.
- Specify Cache Headers available in General Settings on this page.
- Set Last-Modified header, Set Expires header, Set cache control header, and Set entity tag (eTag) – Check all boxes.
- Save all the settings and you are good to go.
WP Fastest Cache:

WP Fastest Cache is another fantastic WordPress caching plugin. This plugin has the most simple customization options. The WP Fastest Cache plugin has more than a million active installations because it gives everything you need at no cost. It also has features like multisite support, minify CSS, JavaScript, and HTML, enable lazy load for images, offers Cloudflare support, and so much more.
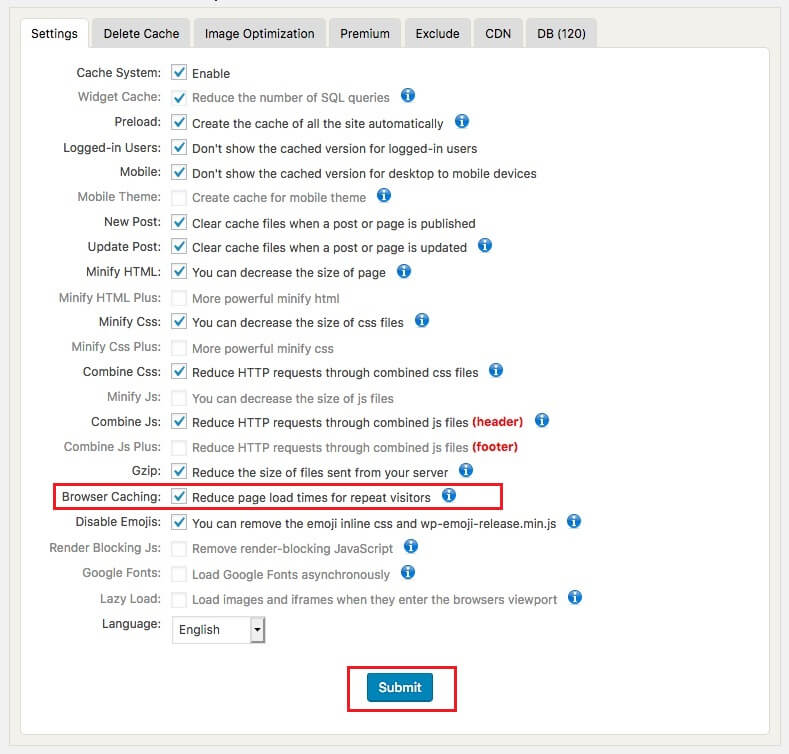
- Download and install the WP Fastest Cache.
- Go to plugin settings.
- Select “Browser Caching” by checking the box.
- Click on “Submit” to apply the changes.
LiteSpeed Cache:
LiteSpeed Cache is the plugin that can easily solve every browser caching warning that Google PageSpeed Insights and GTmetrix display. It is a caching plugin that allows you to fix leverage browser caching by simply enabling the feature. You can set the expiry time for every setting, otherwise, these will be set up automatically.
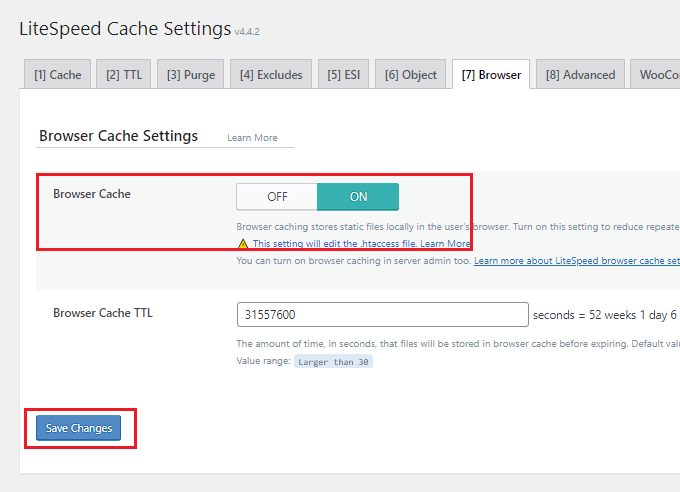
- Install and activate the plugin.
- Go to the plugin settings page.
- Navigate to the Browser tab and enable the “Browser Cache” option.
- Click the “Save Changes” button.
Method 2: Fix Leverage Browser Caching Warning with Code
One of the most common causes of the leverage browser caching warning is when your server lacks the proper HTTP cache headers. Editing the cache headers of your server will change the frequency with which data is updated on your visitor’s browser. There are two different types of headers for leverage browser caching:
- Expires Headers
- Cache-Control Headers
Here, the Expires header is helpful to specify a fixed date and time for the expiry of a cached resource. On the other hand, the Cache-Control header specifies policies of browser caching in both server responses and client requests. Here, policies define how the resource should be cached, where it should be cached, and the maximum age before it expires. Editing the cache headers of your server will change the frequency with which data is updated on your visitor’s browser. We’re going to look at how you can edit two types of HTTP headers in Nginx and Apache. Figure out if your website is using Apache or Nginx servers then go ahead.
Another thing you need to keep in mind is that when you’re dealing with code, you need to be extra careful. The smallest mistake can cause an unfortunate glitch or problem with your website. So, before you move any further, we recommend taking a complete backup of your site.
Enabling Browser Caching on Apache Servers:
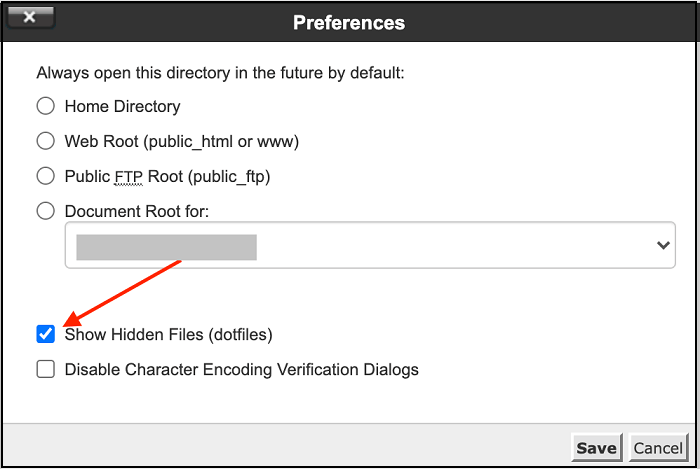
If your website is using an Apache server, log into your cPanel or use an FTP application to gain access to your server. Since the .htaccess file is hidden, you’ll need to make it visible so select the option “Show Hidden Files”.
Now, go to the public_html folder. The .htaccess file is located in this folder. When you find it, right-click and select “Edit”.
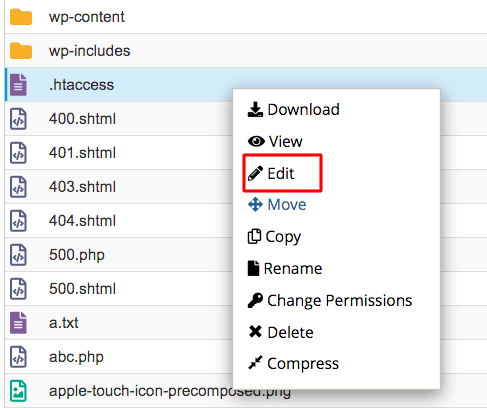
Once you have opened the .htaccess file, you will be able to add the code now.
Add Expires Headers:
Add the following snippet of code to the top of your .htaccess file to add Expires headers:
## EXPIRES HEADER CACHING ##
<IfModule mod_expires.c>
ExpiresActive On
ExpiresByType image/jpg "access 1 year"
ExpiresByType image/jpeg "access 1 year"
ExpiresByType image/gif "access 1 year"
ExpiresByType image/png "access 1 year"
ExpiresByType image/svg "access 1 year"
ExpiresByType text/css "access 1 month"
ExpiresByType application/pdf "access 1 month"
ExpiresByType application/javascript "access 1 month"
ExpiresByType application/x-javascript "access 1 month"
ExpiresByType application/x-shockwave-flash "access 1 month"
ExpiresByType image/x-icon "access 1 year"
ExpiresDefault "access 3 days"
</IfModule>
## EXPIRES HEADER CACHING ##
Add Cache-Control Headers:
After that, you can add these Cache-Control Headers to the top of your .htaccess file to enable cache-control:
<filesMatch ".(ico|pdf|flv|jpg|jpeg|png|gif|svg|js|css|swf)$">
    Header set Cache-Control "max-age=96000, public"
</filesMatch>
Now, save the file and upload it back to the root directory. After that, the web browser will request new versions of the files.
Technically, you can have both headers at the same time, but you don’t have to, it may be a bit of overkill. You can choose to use only the one that seems easier to you. Cache-Control is newer and generally recommended, but Expires is still checked by many page-loading test tools, like GTmetrix. However, whichever code you choose to use, you can edit the caching values, in terms of file type and expiry times, based on your preferences.
Enabling Browser Caching on Nginx Servers:
If your website uses an Nginx server, you will need to use other pieces of code because you won’t be able to find the .htaccess file. You need to add all configurations for Expires or Cache-Control header in the main server block and reload for Nginx to read them. In Nginx, you can find the nginx.conf configuration file in the /etc/nginx/sites-enabled/default location.
Add Expires Header:
To add the Expires header in Nginx, find your server block and add the following code:
location ~* \.(jpg|jpeg|gif|png)$ {
    expires 365d;
}
location ~* \.(pdf|css|html|js|swf)$ {
    expires 30d;
}
As you can see, you can adjust the expiration date for each file type. For instance, we’ve set the expiration time for JPEG, GIF, and PNG files to be one year. We set the expiration time for PDF, CSS, and HTML files to 30 days. You can adjust both the times and the file types according to your needs.
Add Cache-Control Header:
You can also add a Cache-Control header to the same code block:
location ~* \.(js|css|png|jpg|jpeg|gif|svg|ico)$ {
 expires 30d;
 add_header Cache-Control "public, no-transform";
}
The codes mentioned above tell your Nginx server that the specified file types won’t change for at least 30 days. So, it should keep the relevant files saved for that specific time before refreshing them again. You can customize the code the way you want, just as in the previous case.
Save the configuration file and restart Nginx for the changes to take effect. That’s it! Congratulations you have successfully activated Leverage Browser Caching on NGINX Server.
Wrap Up:
Above we’ve shown you two methods to make sure you can implement leverage browser caching. Those methods don’t take long to properly enable leverage browser caching for your WordPress website. You can choose the method that you are comfortable with and the result will be the same. Because at the end of the day, it does not matter which method you choose. The only thing that matters is if the method working as it is supposed to. To test the effectiveness of your caching on page speed, use tools like Google’s PageSpeed Insights and GTmetrix. Once the leverage browser caching is enabled, your website should automatically load faster for your users, especially on repeat visits.
I hope this post helped you in clearing any doubts regarding leveraging browser caching. If you have any queries or any suggestions related to leveraging browser caching leave them in the comments section.
For more articles, check our Blog page. Also, don’t forget to subscribe to our YouTube channel and follow our Facebook page.