
If Google doesn’t have an idea about the existence of your site, no one else will either. That’s the reason configuring your site to Google Search Console is the most important thing you should do right after you make your site public. It will help you to drive traffic to your site, boost conversions, and grow your business from the very first day. But do you know how to configure a WordPress site to Google Search Console? If you don’t, no need to worry! Today we will show you several different ways to configure your WordPress site to Google Search Console.
What is Google Search Console?
Google Search Console is a free service offered by Google, available for all website owners. It was formerly known as ‘Google Webmaster Tools’; back in May 2015 they renamed it ‘Google Search Console’. In a sentence, Google Search Console is a set of tools that helps you to analyze the performance and behavior of your website in a search engine without any cost.
What does Google Search Console do?
Google Search Console allows you to check site ranks, monitor website performance, detect broken links, and many more. It shows you how your site is doing under the hood. Also, it provides a clear picture of how searchers see your site in the search results, how your visitors found you, which keywords and queries can bring more traffic to your site, how rich search results your content has earned, and how your mobile site is doing. Moreover, it has Real-time visitor tracking. This means that you can see who is visiting your website in real time and know how many active users are on your site right now, which pages they’re looking at, and what they are doing any time of the day. Not only this, but it keeps you updated about site errors, security issues, and indexing issues that may affect your website’s search performance.
How to Configure Your WordPress Site to Google Search Console?
We will show you the configuration process in three different stages so that it becomes easy for you to follow them.
Stage: 1
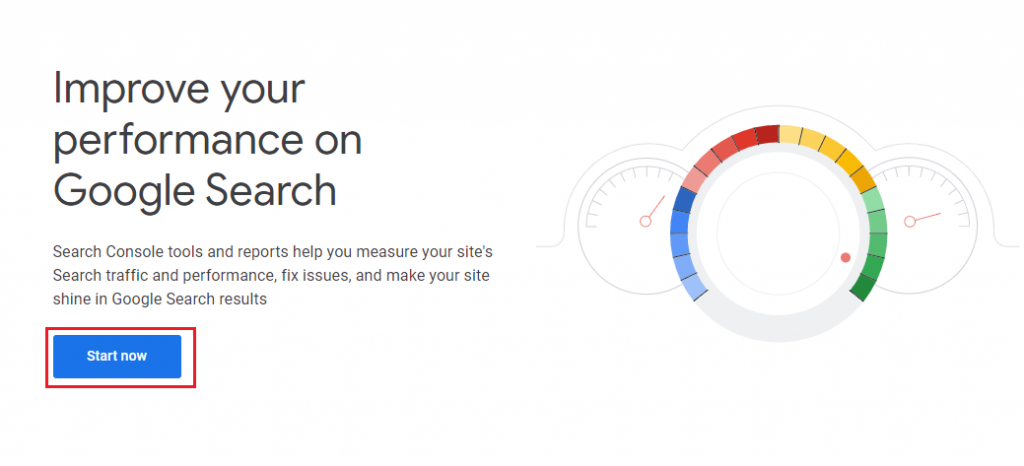
First, visit the Google Search Console site and click on ‘Start Now’.
You have to log in to your Google account to move forward. Once you log in, you will be redirected to the following page.
Stage: 2
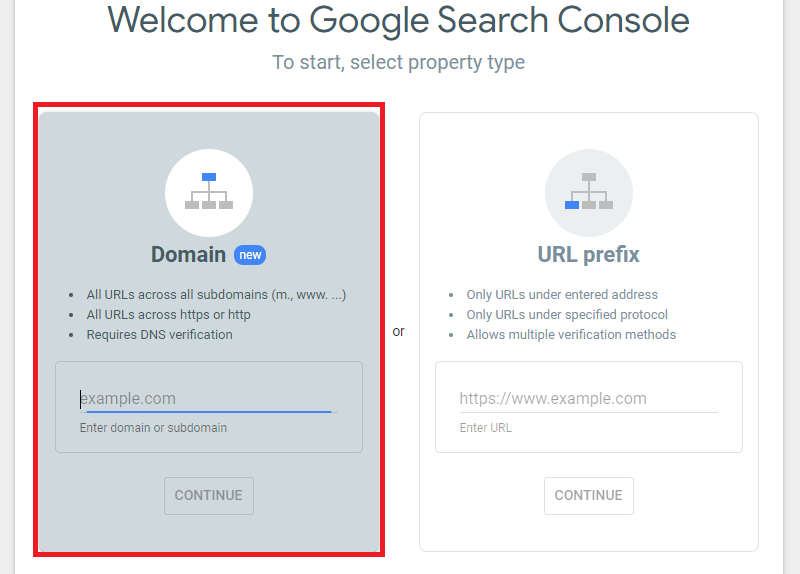
At this stage, you need to choose one of the following methods. For now, we are selecting the ‘URL prefix’ method. But don’t worry we will show you how you can verify your site with ‘Domain’ (With DNS Text Record) also.
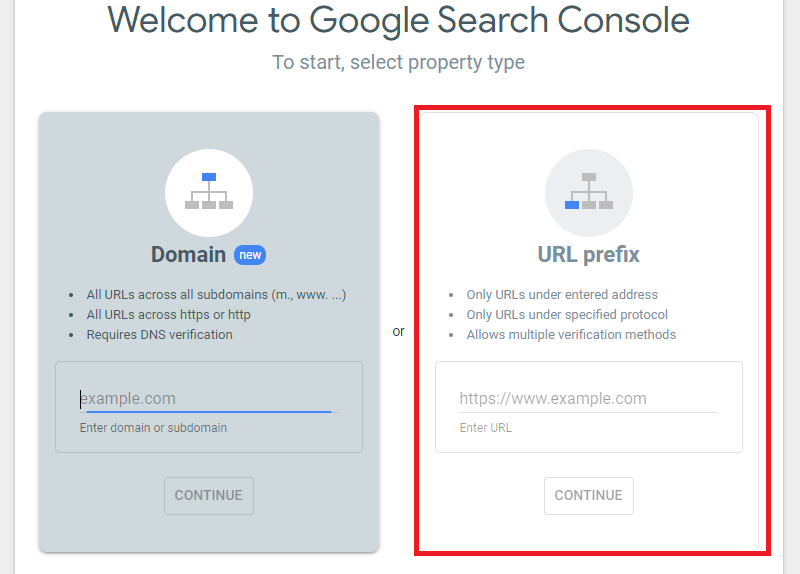
So, enter your WordPress site URL correctly and press the ‘Continue’ button.
Stage: 3
Here, you can see in the following picture that, there are several options to verify your site. You need to choose any one of them to verify.
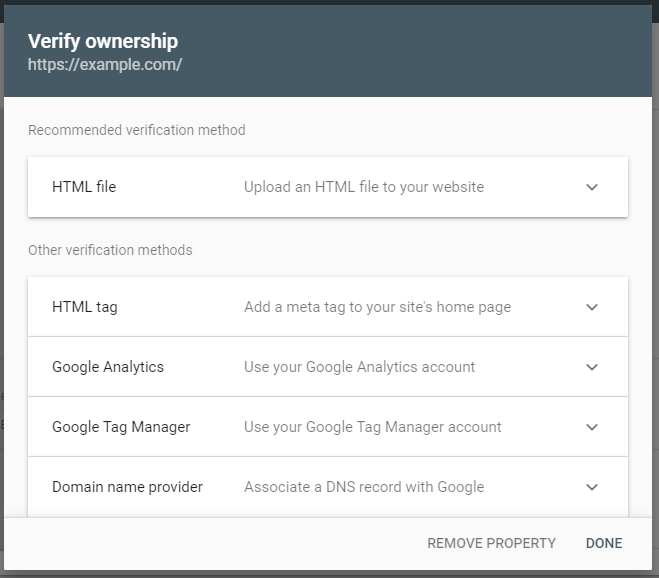
Now we will see how you can verify your WordPress site using these options.
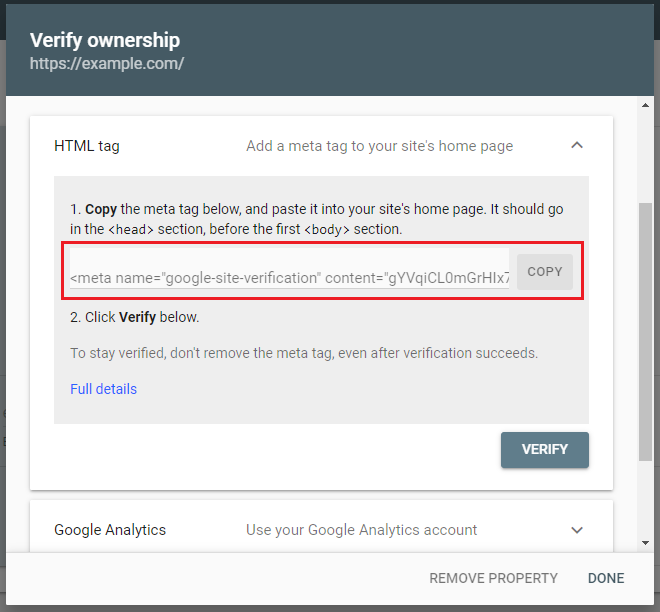
1. With HTML Tag:
We are showing you this way first because it’s the easiest and most recommended one. First, click on the ‘HTML Tag’ section, and you will see a new section appears. Now, copy the code inside the white box.
At this point, you can follow two different methods for HTML Tag verification. One is using any SEO plugin and another is using Insert Headers and Footers plugin.
i) Using SEO Plugin:
As most of us use an SEO plugin to improve our site SEO, so we are showing you the SEO plugin method first. We are using the Yoast SEO plugin here, but if you want to choose any other plugin, that’s completely ok!

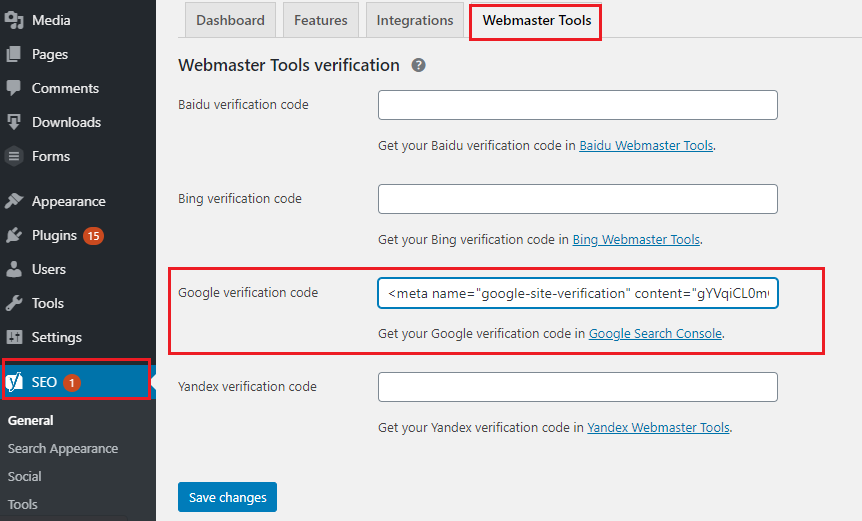
First, navigate to the ‘SEO > General’ menu on your admin menubar area, then click on the ‘Webmaster Tools’ tab. Here you will get different areas for different verification. Paste the code into the ‘Google Verification Code’ area and click the ‘Save’ button.
ii) With Insert Headers and Footers:
First, install and activate the Insert Headers and Footers plugin.
Then navigate to ‘Settings > Insert Headers and Footers’. Now, paste the meta tag code on the ‘Scripts in Header’ box.
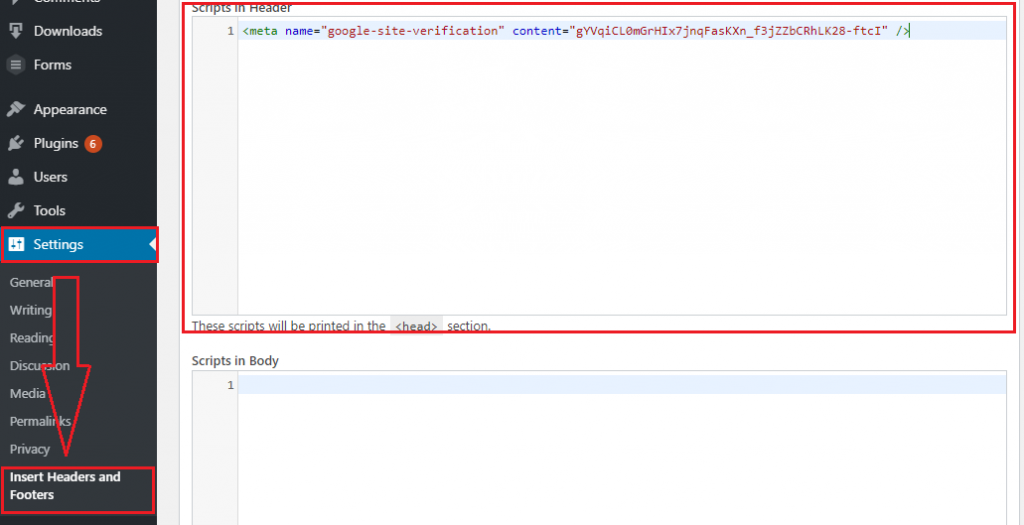
Once you have done this, scroll down and click on the ‘Save’ button.
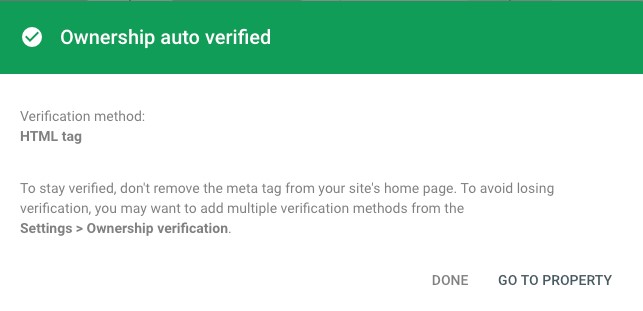
After finishing any of this process, go back to Google Search Console verification settings and click the ‘VERIFY’ button. If you were able to verify your site then a popup message of ‘Owner Verification’ will appear as shown.
2. With HTML File:
To verify your WordPress site in this way, first press the ‘HTML File’ section and download the file.
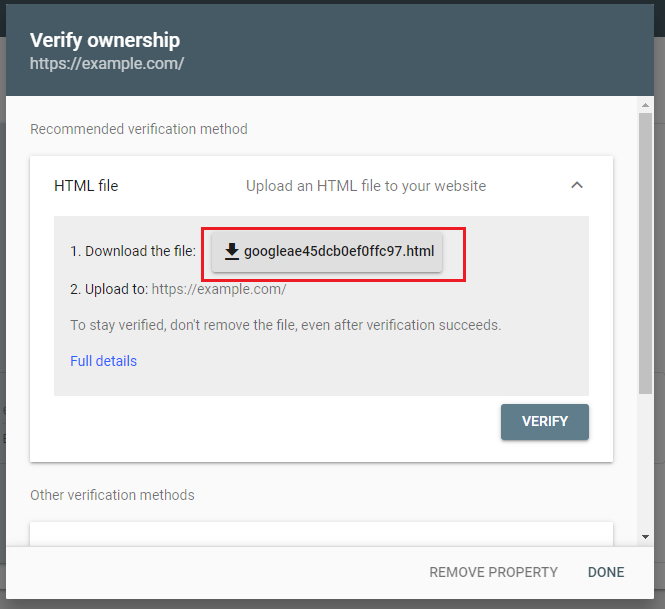
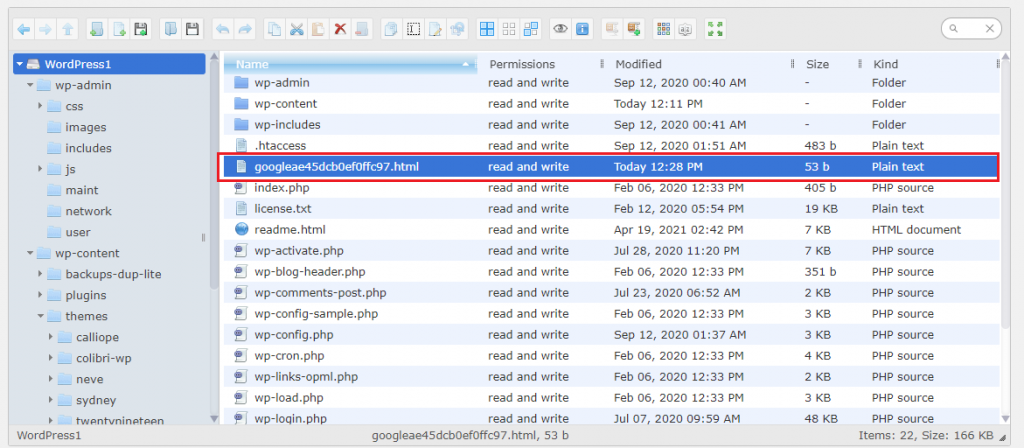
Now, upload the file to your WordPress site root directory (which contains the wp-content folder, the wp-config.php file, etc.) via any FTP.
Again go back to the Google Search Console and click on ‘VERIFY’.
3. With Google Analytics:
If you already configured Google Analytics connected to your site, this method will be the fastest one for you. If you don’t know how to add Google Analytics to your site, check this article. You will get a complete guide on why you should add Google Analytics to your WordPress site and how.

So, just click on the ‘Google Analytics’ section on Google Search Console and press the ‘VERIFY’ button.
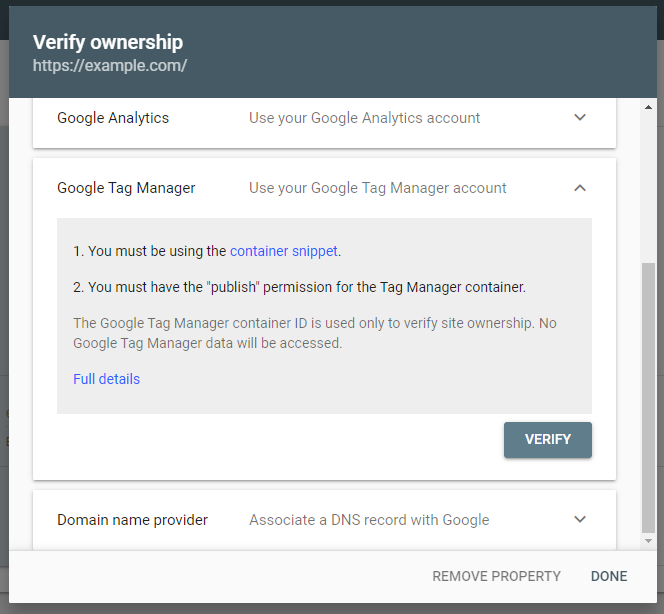
4. With Google Tag Manager:
Just like Google Analytics, if you’re already using Google Tag Manager, you can verify your site with just a single click. Select the ‘Google Tag Manager’ section and click on the ‘VERIFY’ button.
5. With DNS Text Record:
This is the only way where you can verify your WordPress site by choosing the ‘Domain’ on stage: 2. So, enter your domain name on Google Search Console and click the button ‘Continue’.
In this way, you’ll need to add a TXT record at your DNS provider instead of adding any code to your site. For that, copy the text record on the white box and paste that onto your DNS server.
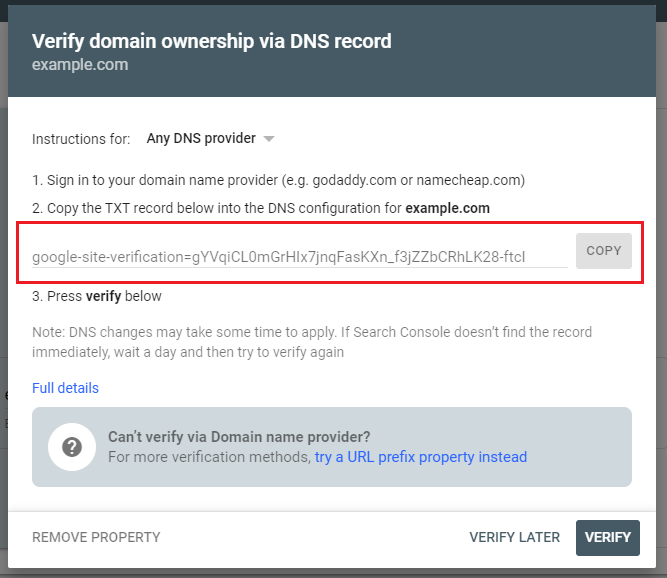
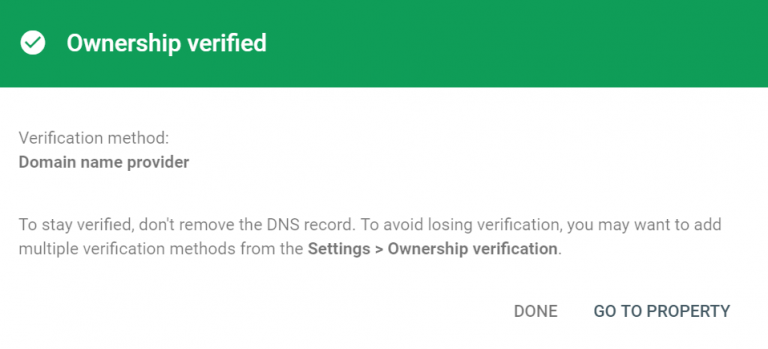
Finally, all you need to do is click verify and you will get the following verification message.
In this article, we learned how to drive more traffic to our WordPress site by configuring Google Search Console. You can check our article on How to Increase Ranking on Search Engine and How to Increase Dwell Time, to optimize your WordPress site SEO.