Opt-in Magic
Installation
# How to install Optin Magic Add-on for WordPress Download Manager.
Download the latest version of Optin Magic add-on from your Dashboard → Purchases Tab from www.wpdownloadmanager.com. Then from the website dashboard go to “plugins >> add new >> upload” and upload the plugin zip file there. After successfully upload the plugin click on activate button then the plugin menu will show up on the dashboard.
Or
If you want to install this plugin via FTP client like FileZilla, unzip this plugin to your computer. Upload “optin-magic” directory to your sites “/wp-content/plugins/” directory.
Now search for “Optin Magic” in your WordPress admin panel by going Plugins -> Installed Plugins.
Activate “Optin Magic” plugin by clicking “Activate” link which is below the title “Optin Magic”.
If you successfully Activate this plugin, you will see a message “Plugin activated.” at the top of the page. You will also notice a new menu named “Optin Popups” in your WordPress admin panel.
Admin Panel:
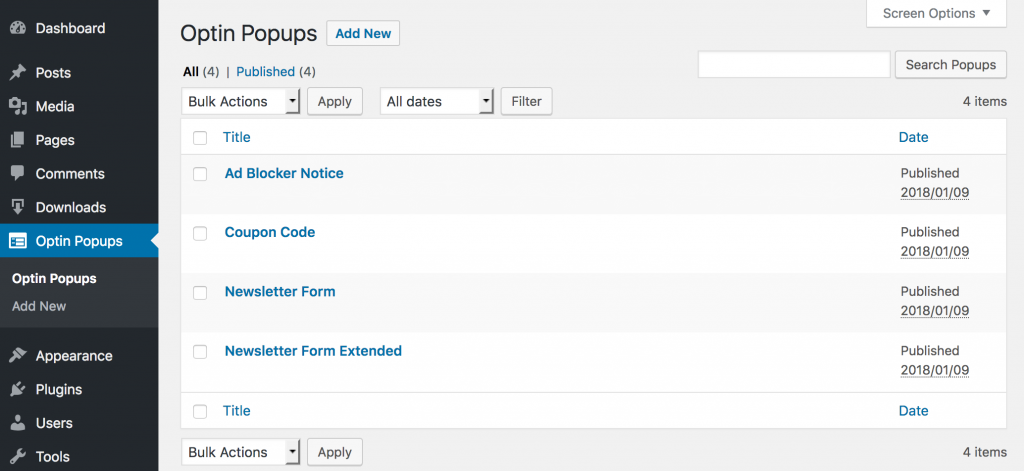
# Optin Popups:
Here you can view the list of all Optin Popups. Initially, popups list will be empty. After you add a popup, it will appear in the list.
# Create new Opt-in Popup:
To create new popup Click Add New button from your WordPress admin panel Optin Popups Menu item.
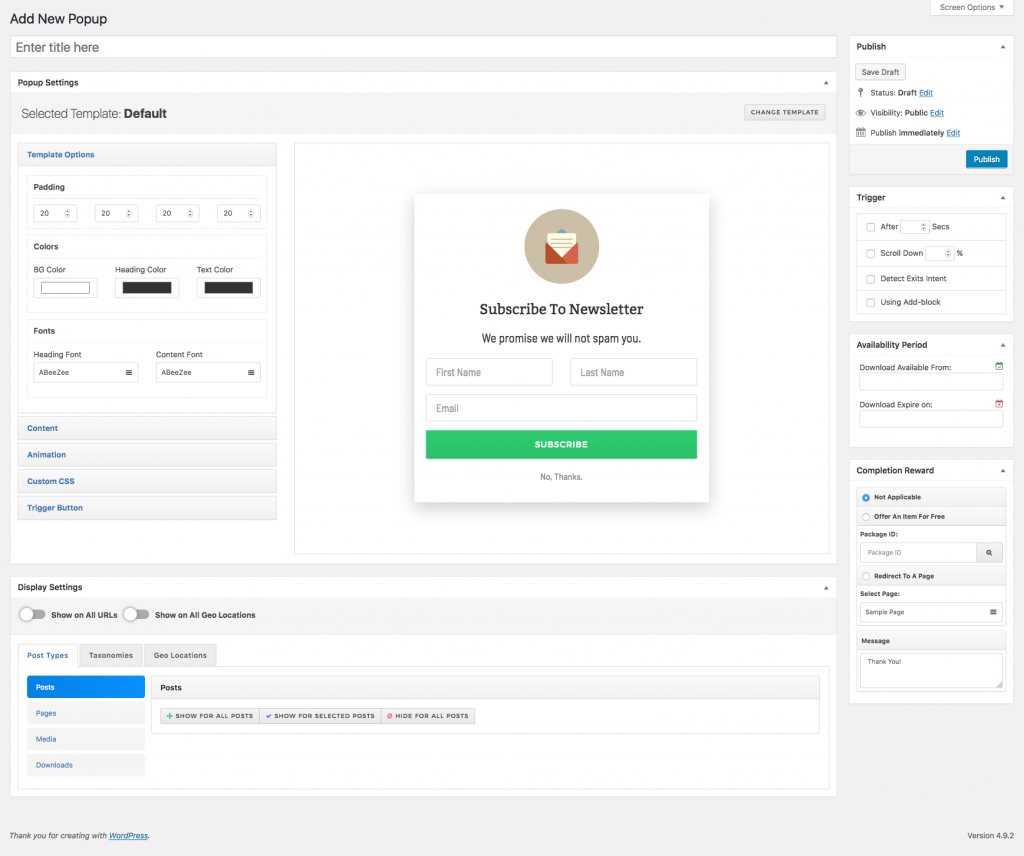
Popup Title: Give your popup title here.
Popup Settings: You can design and modify your popup from the settings.
Selected Template Button: You can see the template name which you are using for popups.
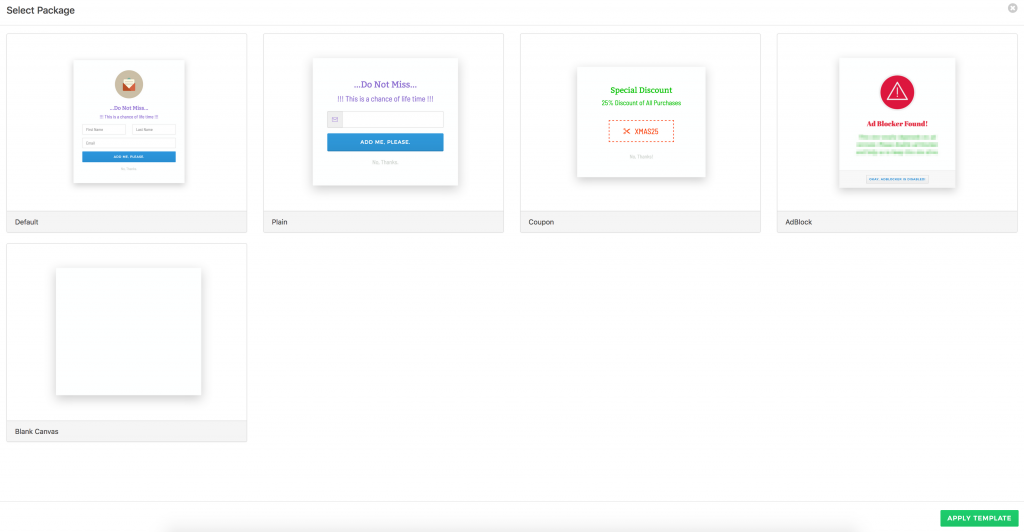
Change Template: You can select any template from here depending on your need.
Template Option: You can design your template from this option.
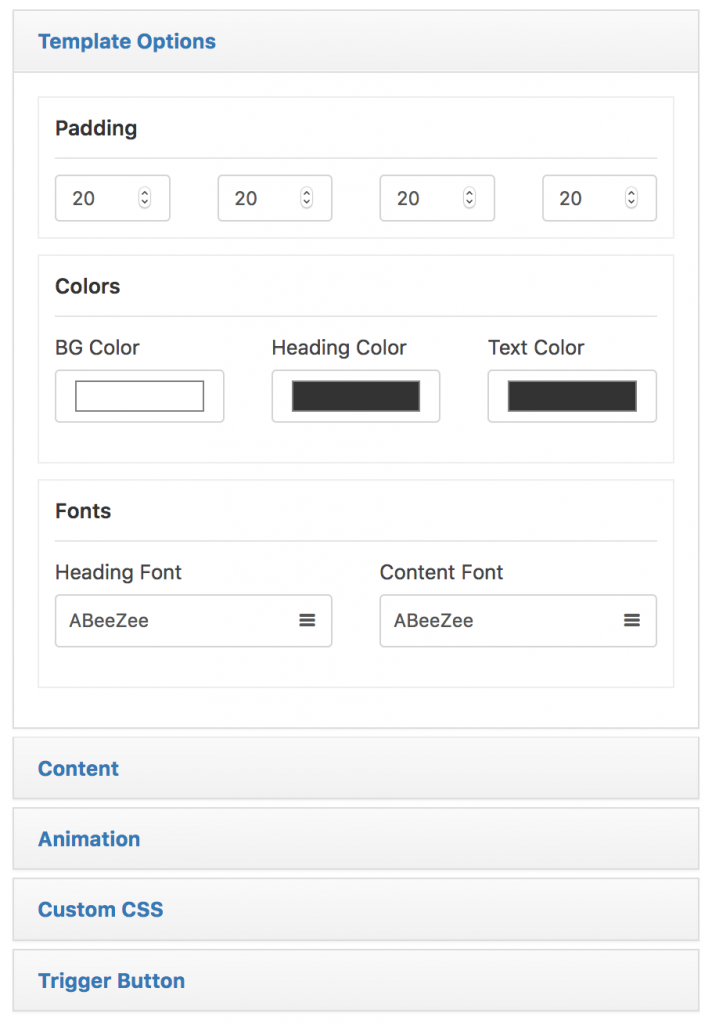
- Padding: You can give padding for content in the popup from here.
- Colors: You can set background, heading and text color from here.
- Fonts: You can change the heading and content font type from here.
Content:
You can modify the popup content from this option. Data fields in this section will change depending on the selected template.
- Icon URL: Put the image URL of the icon here.
- Heading: Give the popup heading text here.
- Sub Heading: You can set the sub heading here which will show below the heading text.
- Subscriber Button Label: You can give the button level from here.
- Subscriber Button Color: You can set a color for the button here.
- Decline Link Label: You can set the label for disable/cancel the popup button.
- Decline Text Color: Set the text color of decline text from here.
Animation:
You can set different animation for the popup from this option.
- Entrance: You can set entrance animation from the list of animation here.
- Exit: set the exit animation from here.
Custom CSS:
If you want to customize the look your Optin Magic contents with custom CSS, you can put your custom CSS code here.
Trigger Button:
You can enable and disable trigger button from here. If enabled your site visitors will see a trigger button to launch the popup. When a user clicks on the button the popup will show up.
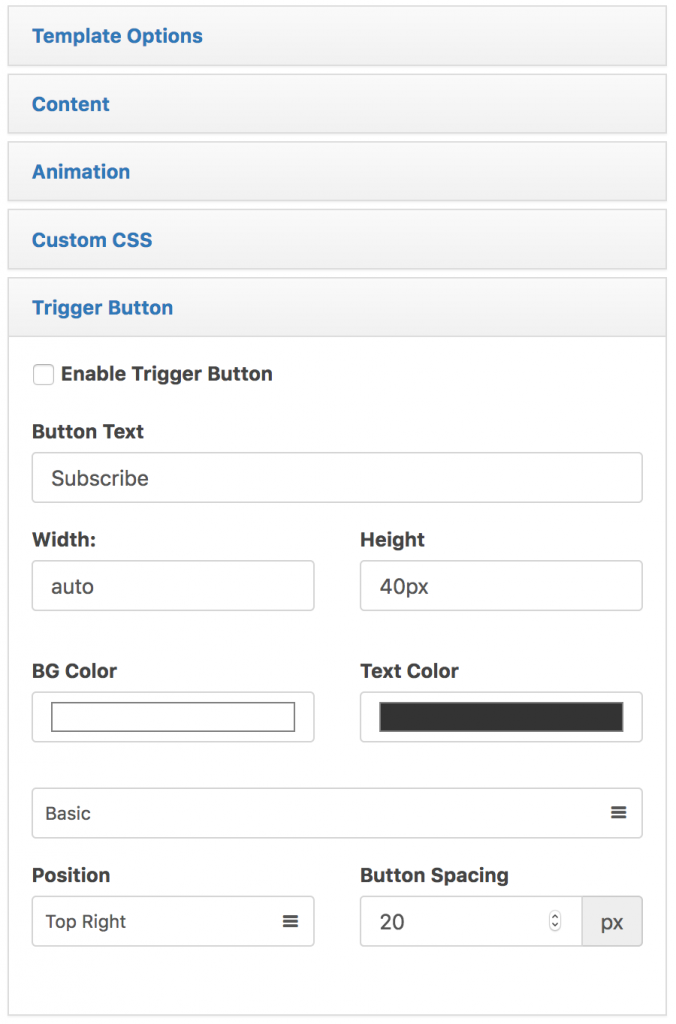
- Button Text: You can set the trigger button text here.
- Width: Put the width of the button from here, by default is `auto`.
- Height: put the height of the trigger menu button in the frontend.
- BG Color: Background color of the trigger button.
- Text Color: Text color of the button.
- Position: You can set the button on different positions of the menu.
- Button Spacing: You can set the button spacing from here.
You can have tree type of trigger button, ‘Basic’, ‘Corner’, ‘Floating’. You can select them from the option.

# Display Settings:
You can control URLs and GEO locations where you want to show the popup or not. If you want to restrict the popup to specific page or content you can do it from here. You can also show the popup in every page by selecting show on all URLs from here.
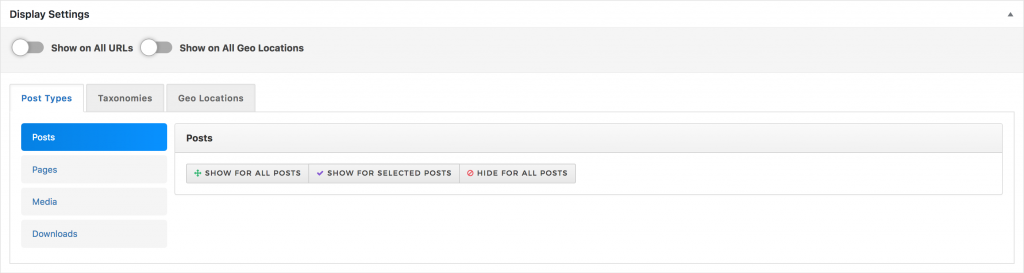
- Show on All URLs will show the popup in all pages to all users.
- Show on All Geo Locations will show the popup on all geolocation users.
Post Types:
You can select different post type here to show the popup in specific posts.
- Show For All Posts: Select if you want to make the popup visible for all posts in this post type
- Show For Select Posts: Select if you want to make the popup visible only for selected posts in this post type, and then select the posts where the Optin Magic should be visible
- Hide For All Posts: Select if you don’t want to show Optin Magic for this post type
Taxonomies:
You can show the popup on specific taxonomies from this option. You can select from Categories, Tags, Navigation Menus, Link Categories, Format from here.
Geo Locations:
You can select one/multiple geolocations from here to show the popup on specific regions.

# Trigger:
From here you can set the option for when the popup will trigger after any user browse the website.
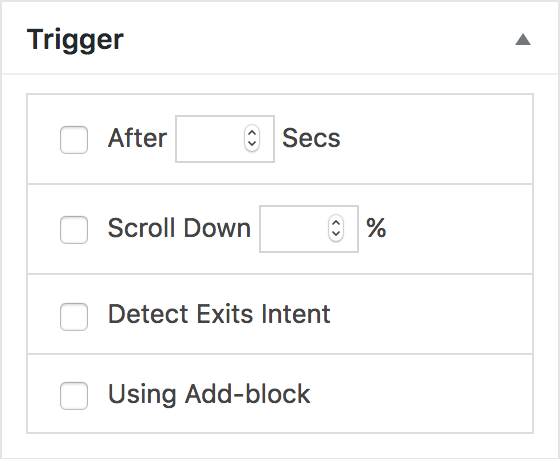
- You can set the amount of time in second, so the popup will show after this much time user visit the website.
- You can give percentage of the scroll down of the page, so the popup will show after user scroll the page that much.
- Detect Exits Intent will detect when the user going to click on close button on tab and show the popup to user.
- Using Add-block will check if the user using any ad blocker and you can show popup to disable ad blocker.
# Availability Period:
You can give time period for the popup, it will be disabled after the time expire.
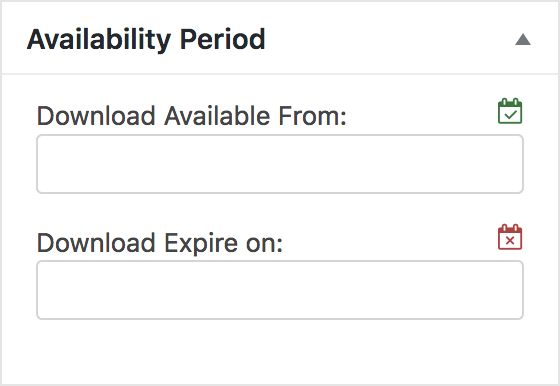
- In the available from date select the date you want to start showing your popup.
- In the expire on date select the date you want to stop showing your popup
# Completion Reward:
You can set popup completion reward from this option.
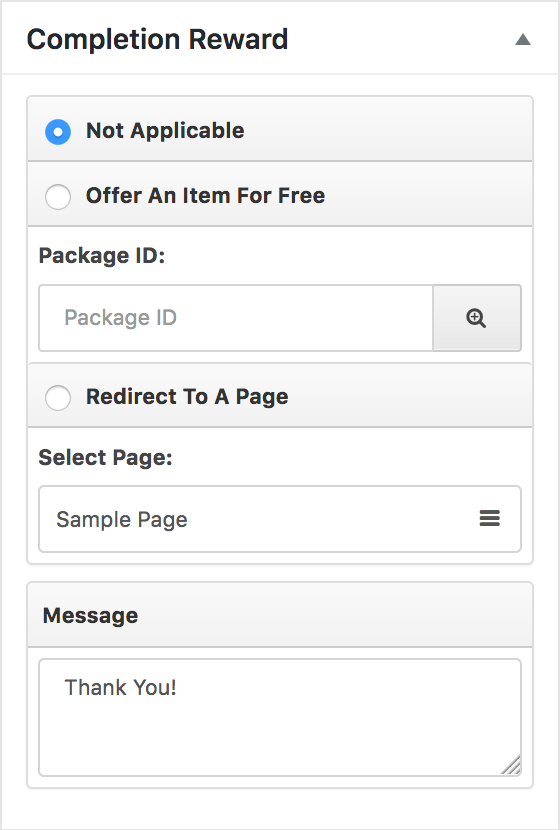
- Not Applicable: if you don’t want to give any reward.
- Offer an Item for free: You can select any package id of WordPress Download Manager as reward from here.
- Redirect to a page: Select a page where you want to redirect the user after the popup completion.
- Message: You can set custom message for user who complete the popup from here.
Publish:
When you are done with setup hit the button to publish the Optin Magic.